
Get better image at high ISO - Part II
processing the image
In the first part of this two part series, I spoke about getting the best starting image you can when shooting at high ISO's. If you have not read it yet, check it out first, as this is what makes the biggest difference in the final image quality. You can check it out HERE!
That being said, post-processing is an important part of bringing your photography to fruition. If has the ability to make OK images good, and good images great. It can also destroy an image if not done correctly. The higher the ISO the less latitude you have in processing. You have a lower dynamic range in your image, the image is less sharp, and the overall image quality is less. Adding salt to the injury is the fact that your RAW file (as you should be shooting RAW) is larger the higher the ISO. In short, you have a lot less to work with on an image that require more work to make great.
Balancing detail against noise
The hardest part of processing a high ISO image is removing unwanted noise whilst maintaining the detail and sharpness of the image. These can be contrary features and finding this balance is where most people stumble. As a general rule, I am a fan of 'less is more' when it comes to post-processing. I like the resultant image to look like the scene as I saw it and there to be no obvious processing.
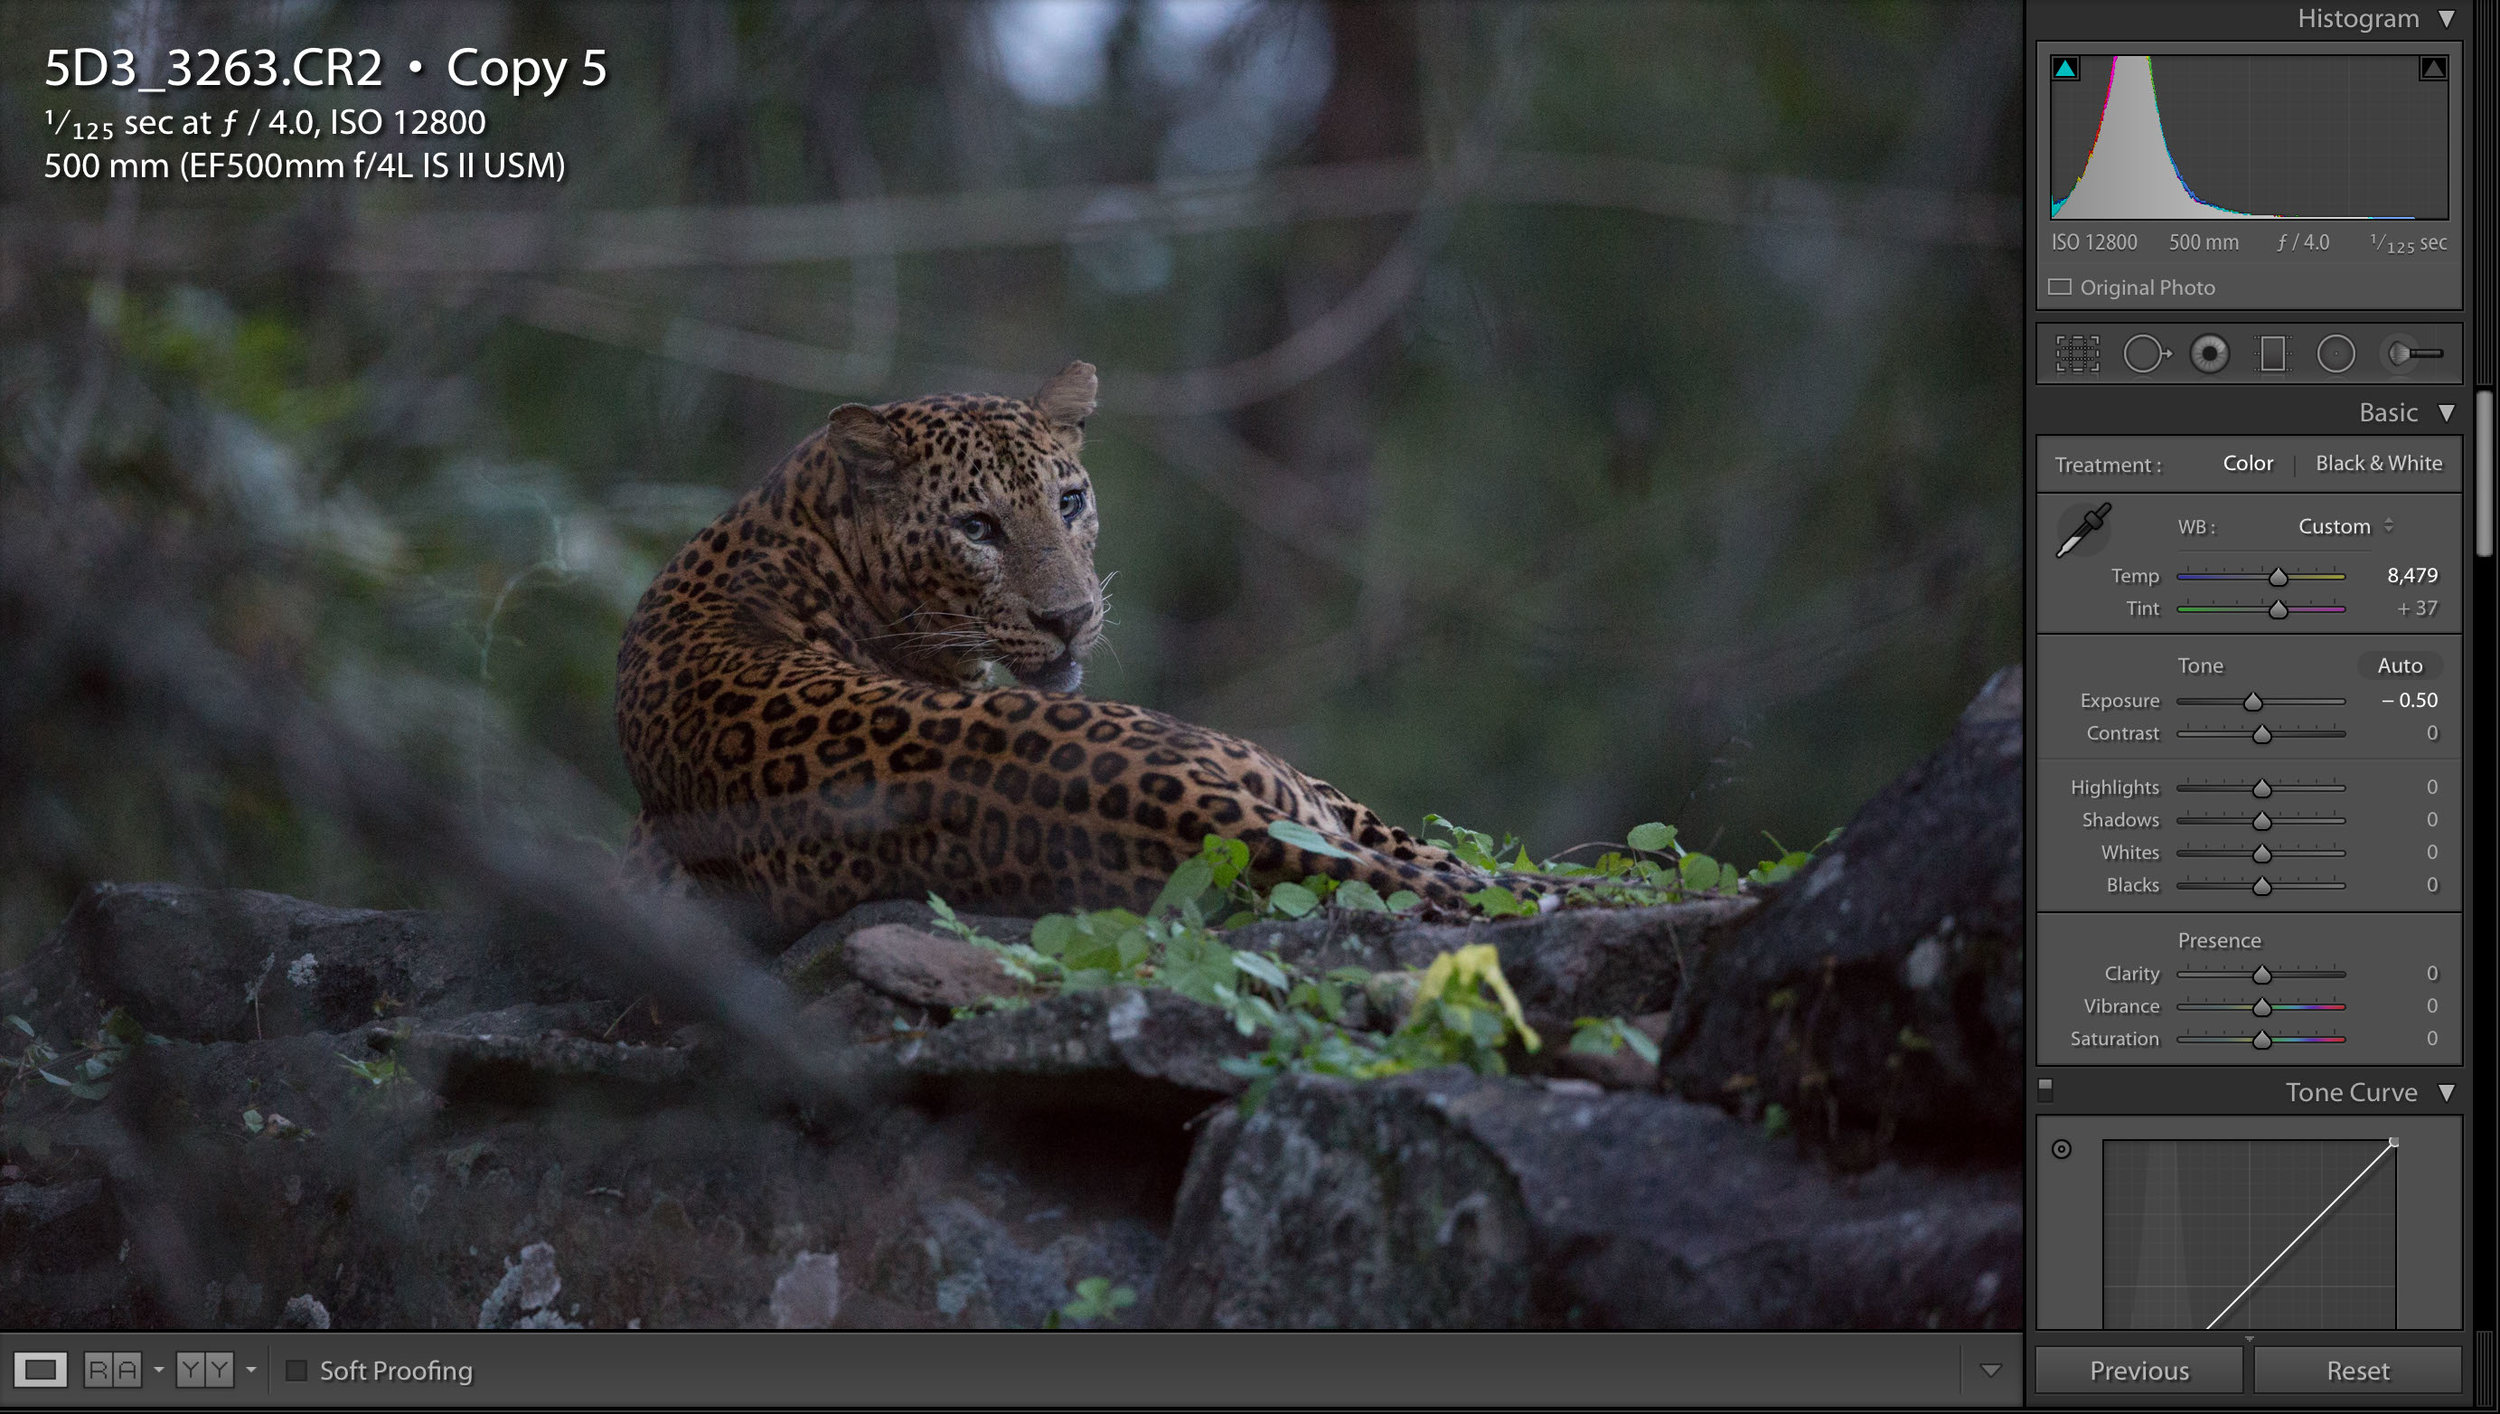
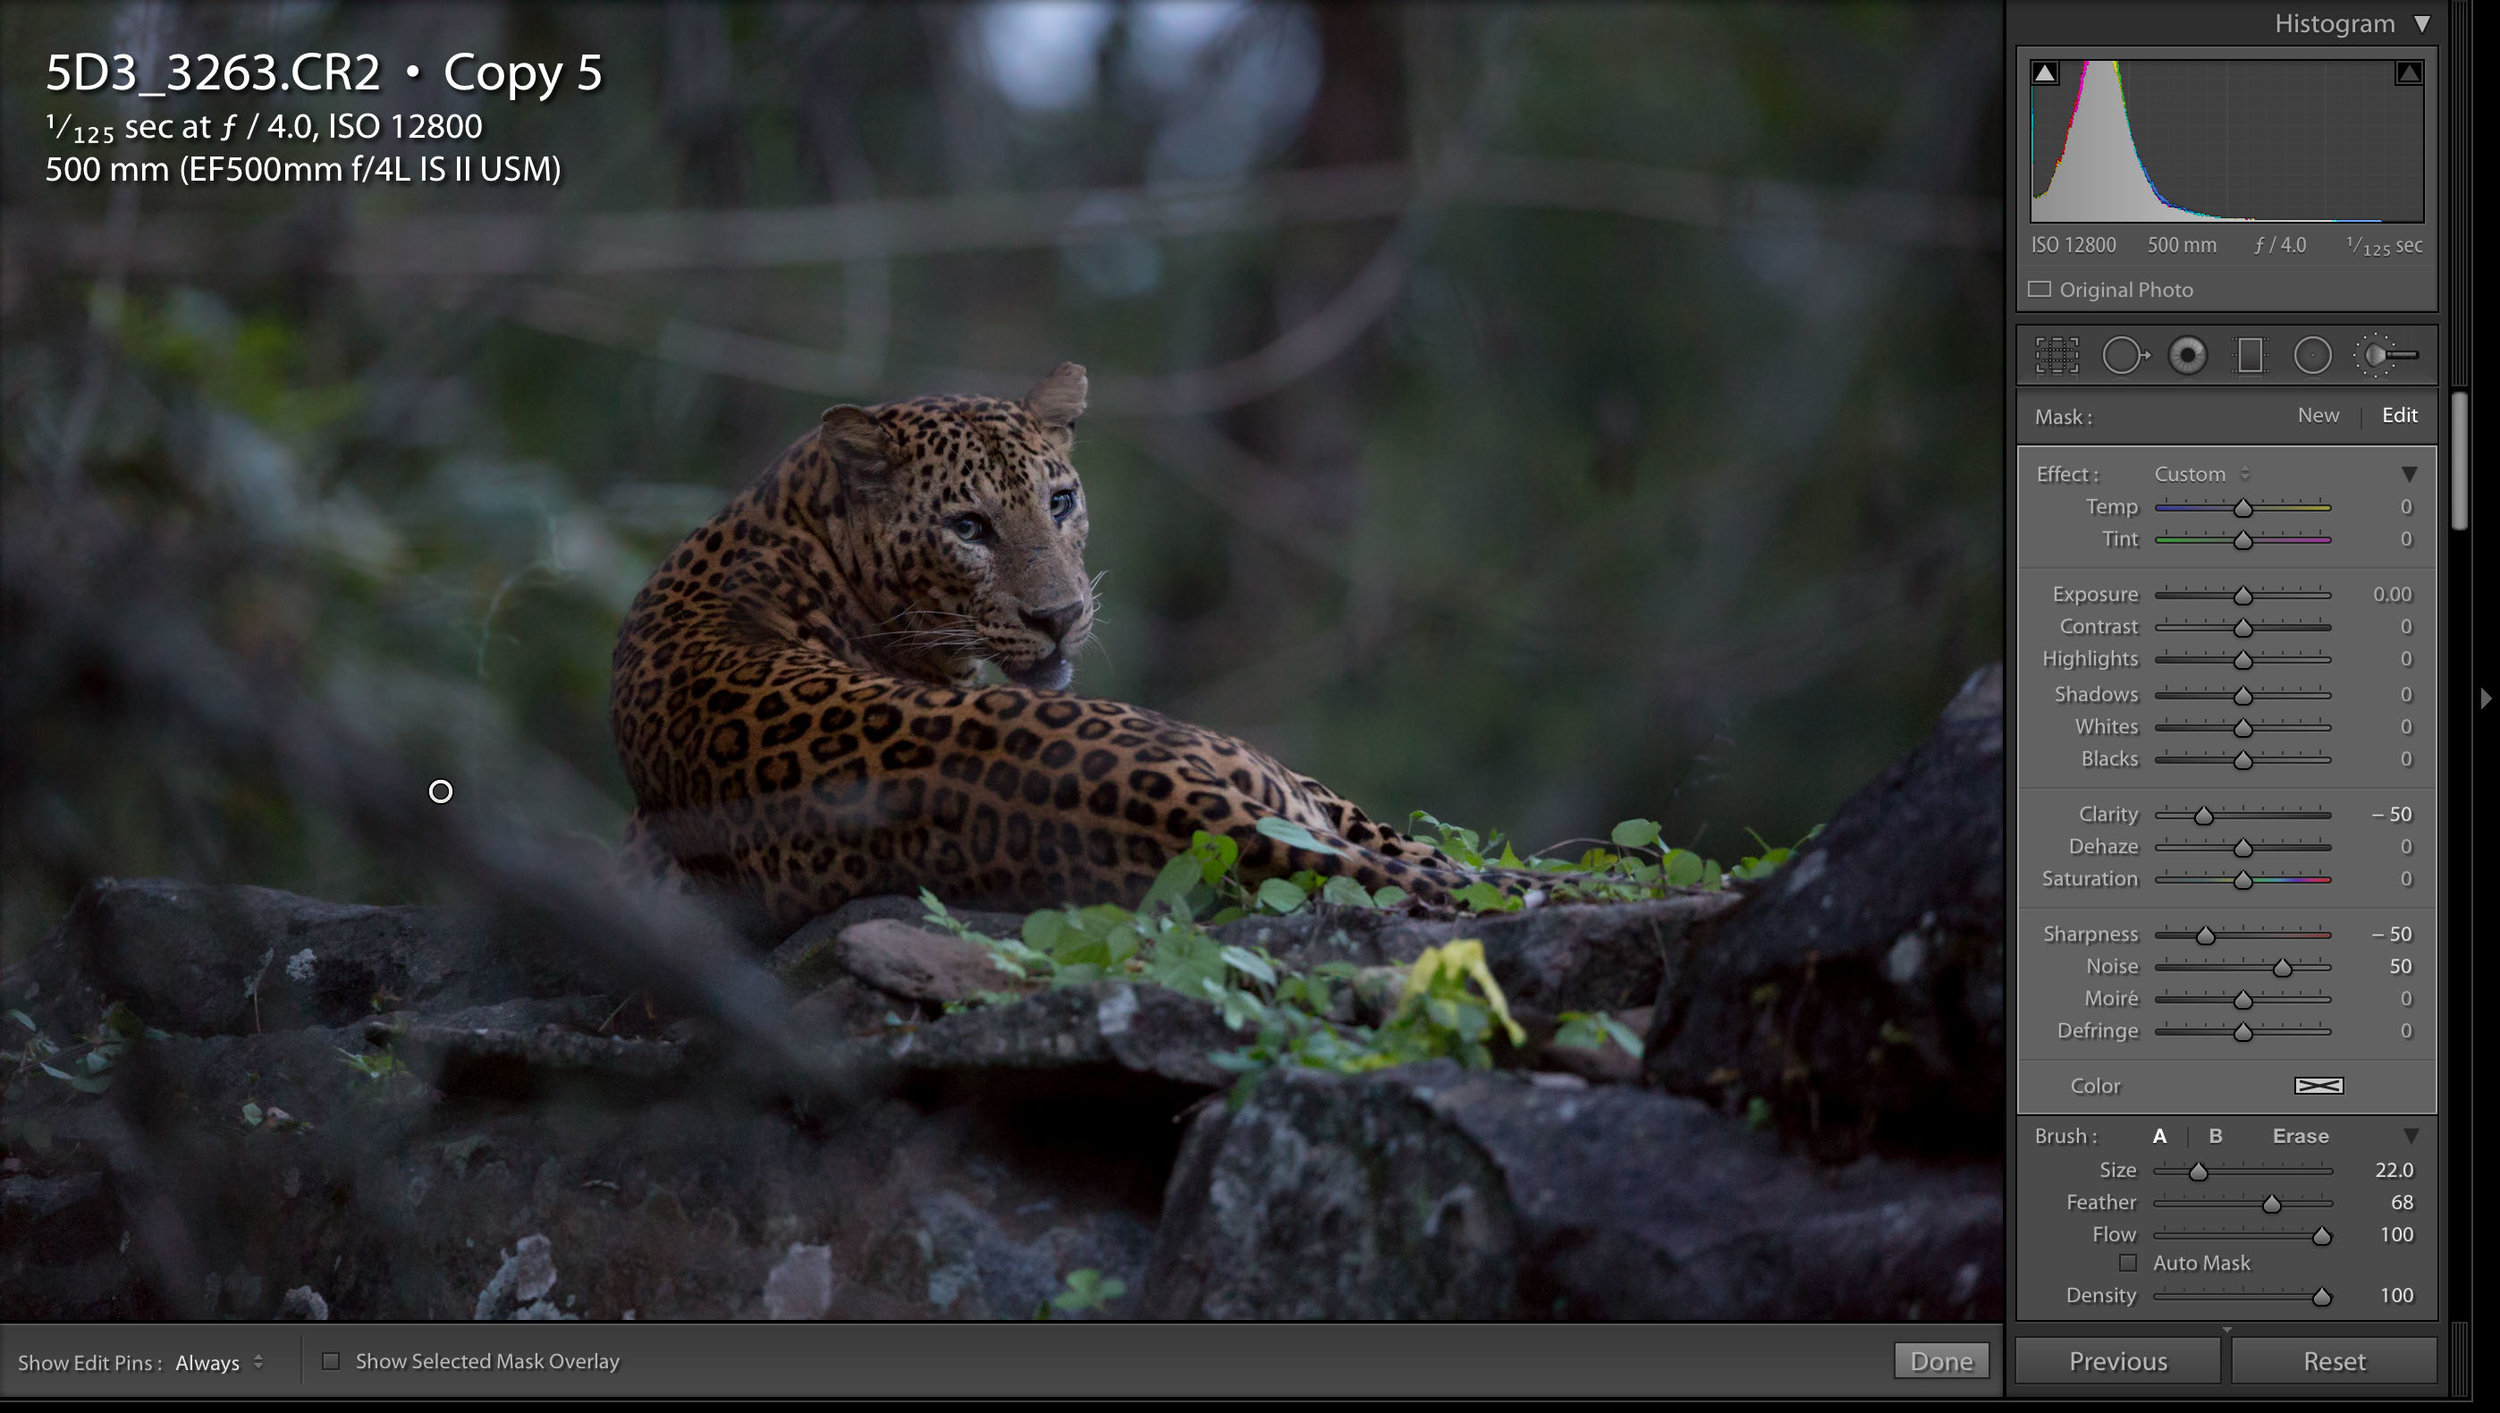
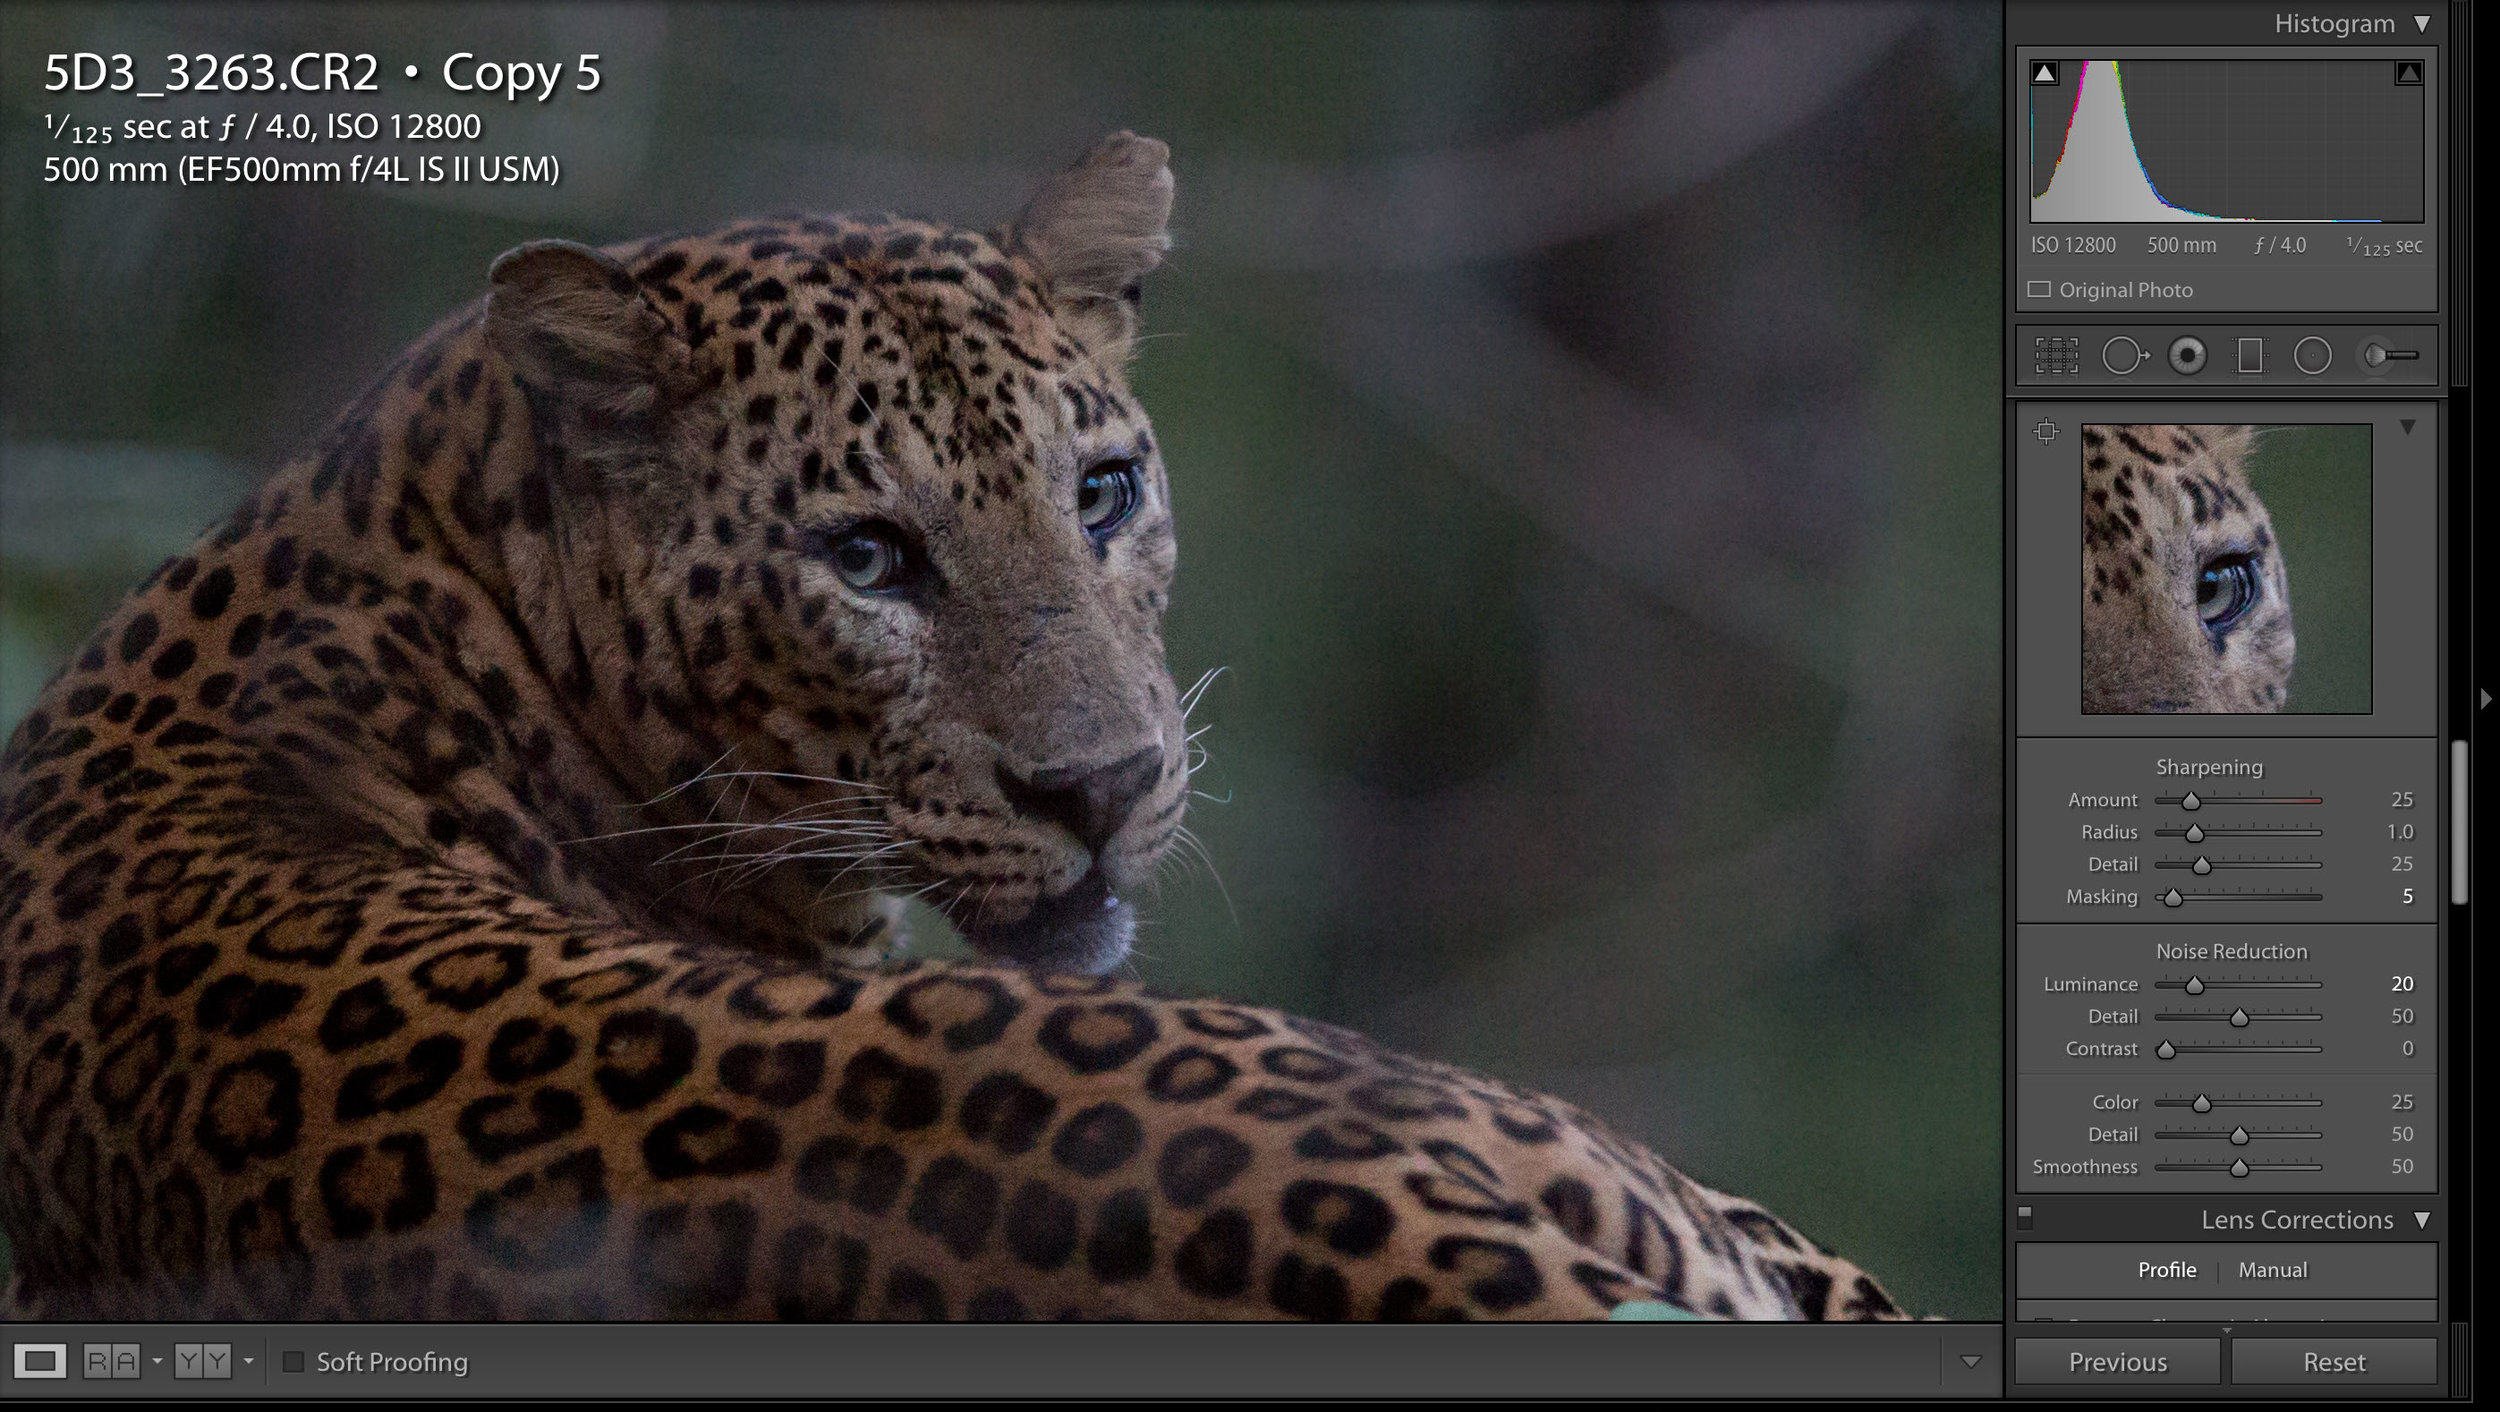
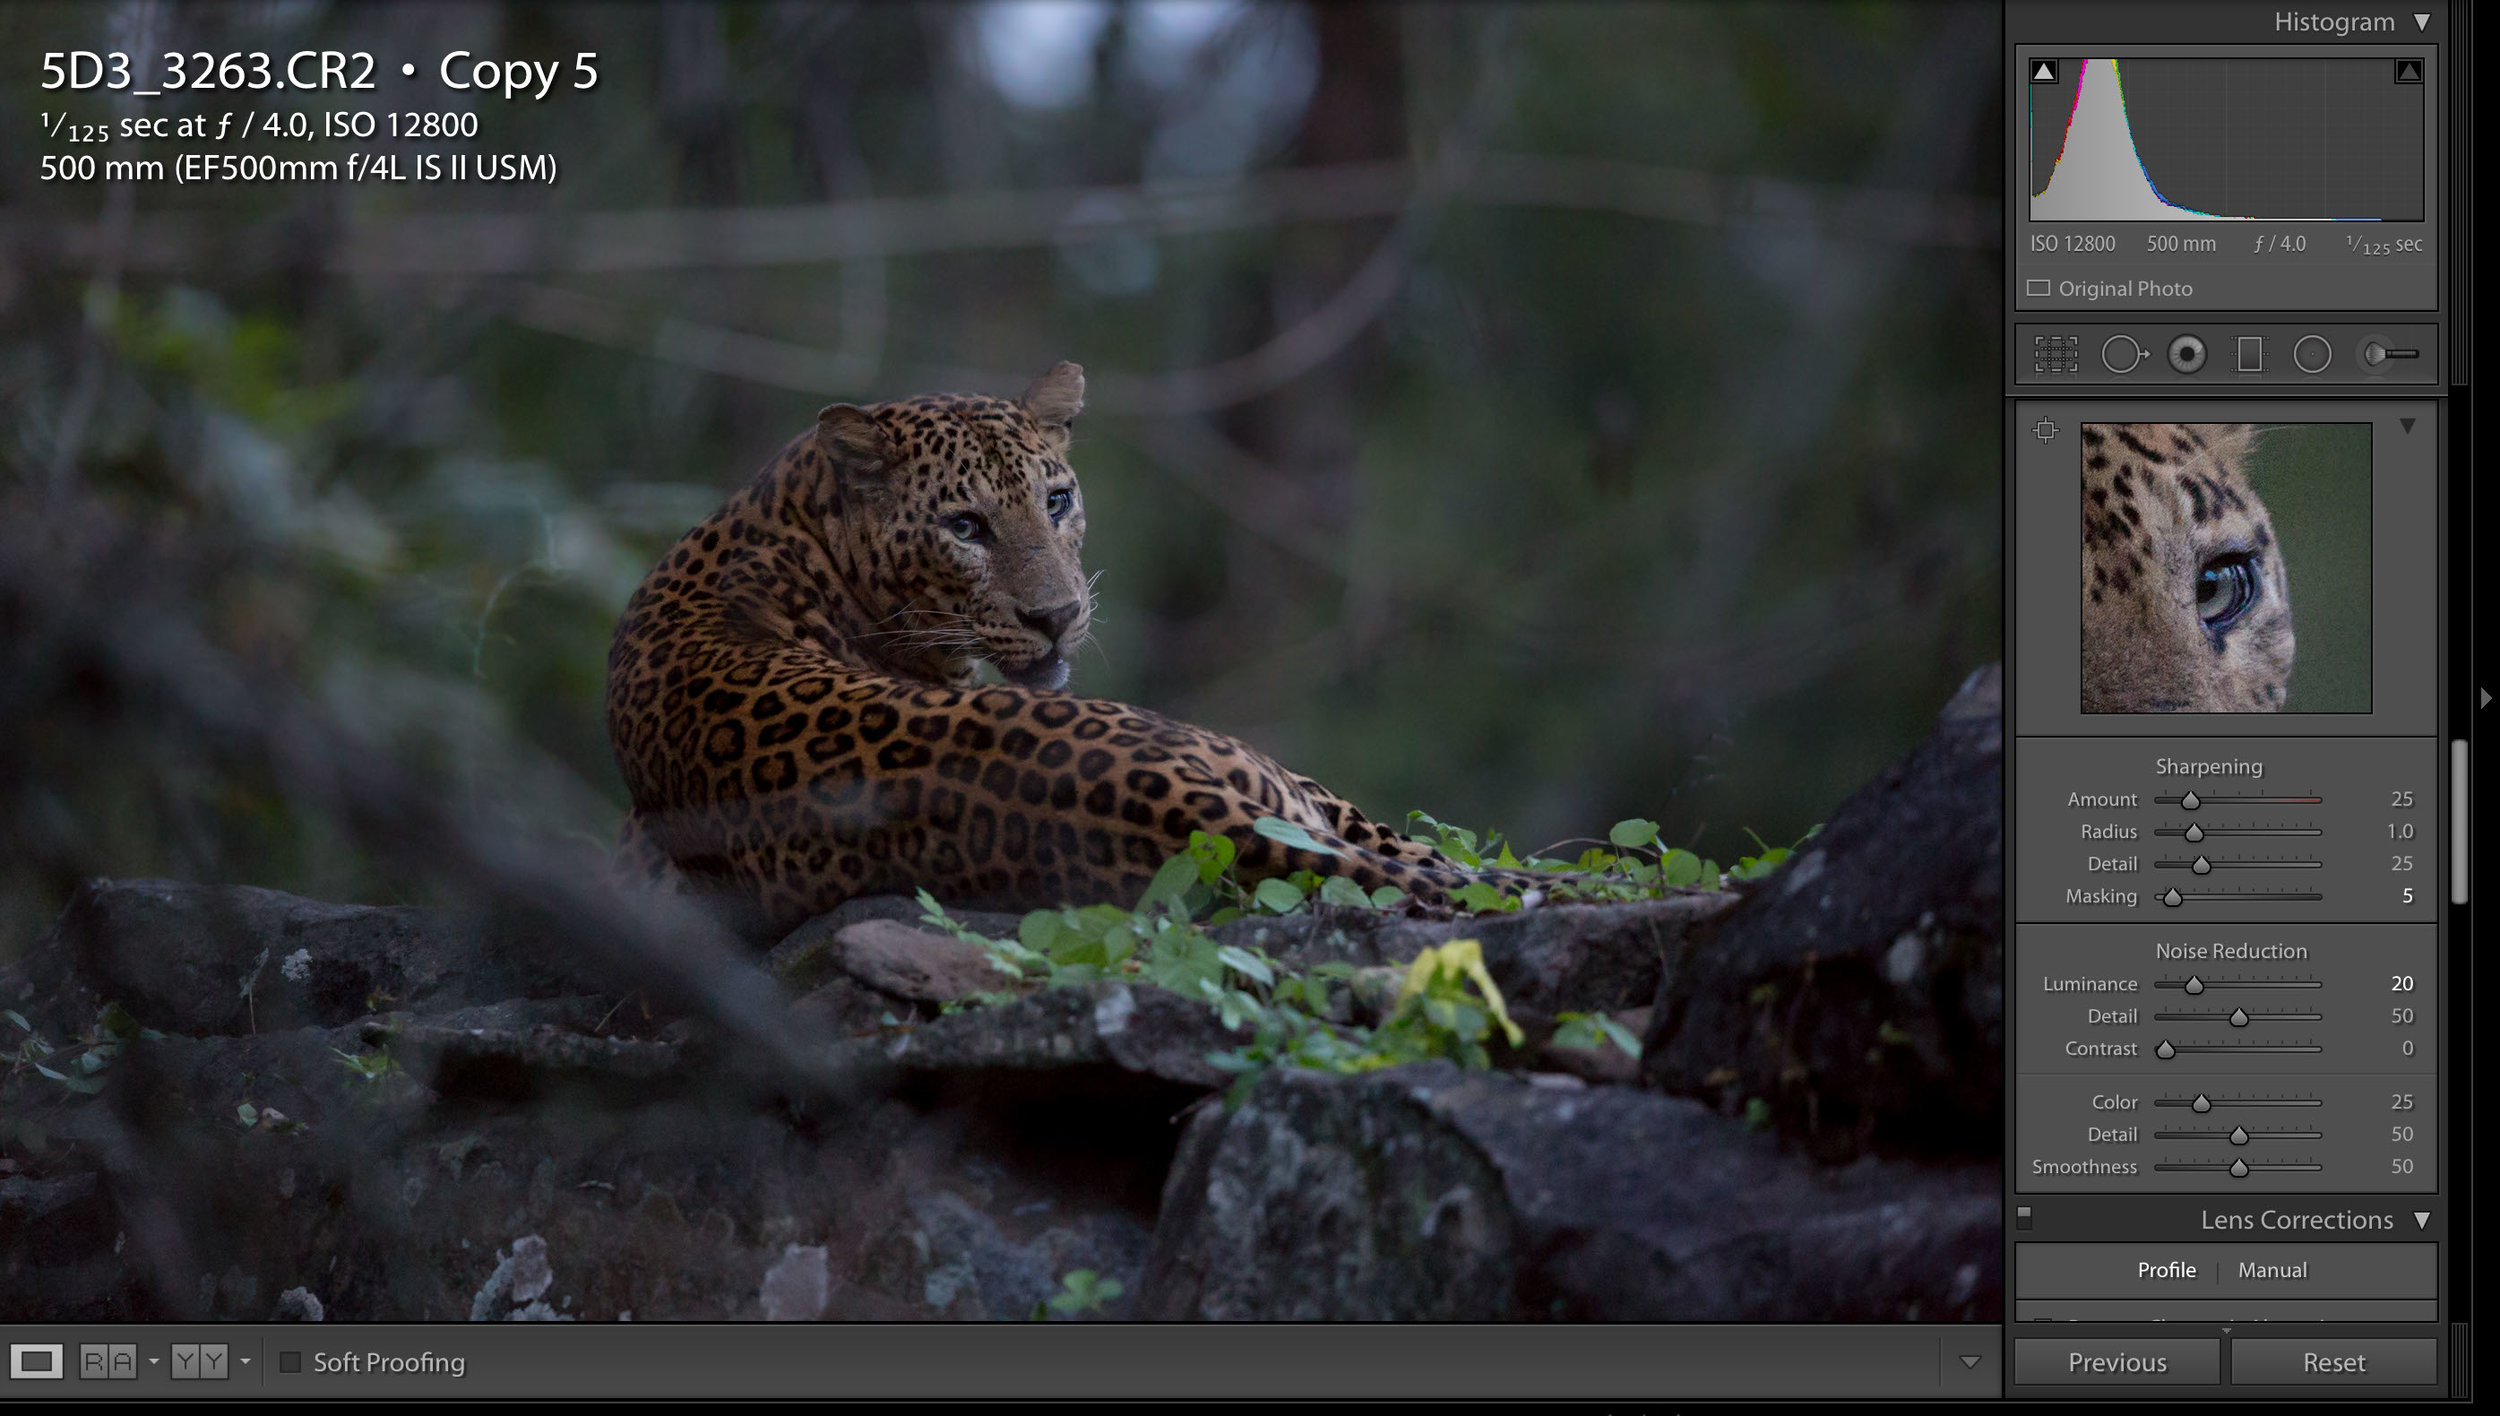
For this example I am using a leopard I had very little time with in low light and had to use ISO 12800. The image is sharp, and I used exposure compensation in aperture priority mode, combined with ETTR to get the RAW image. Here is the before and after comparisons... This ISO 12800 image was published.

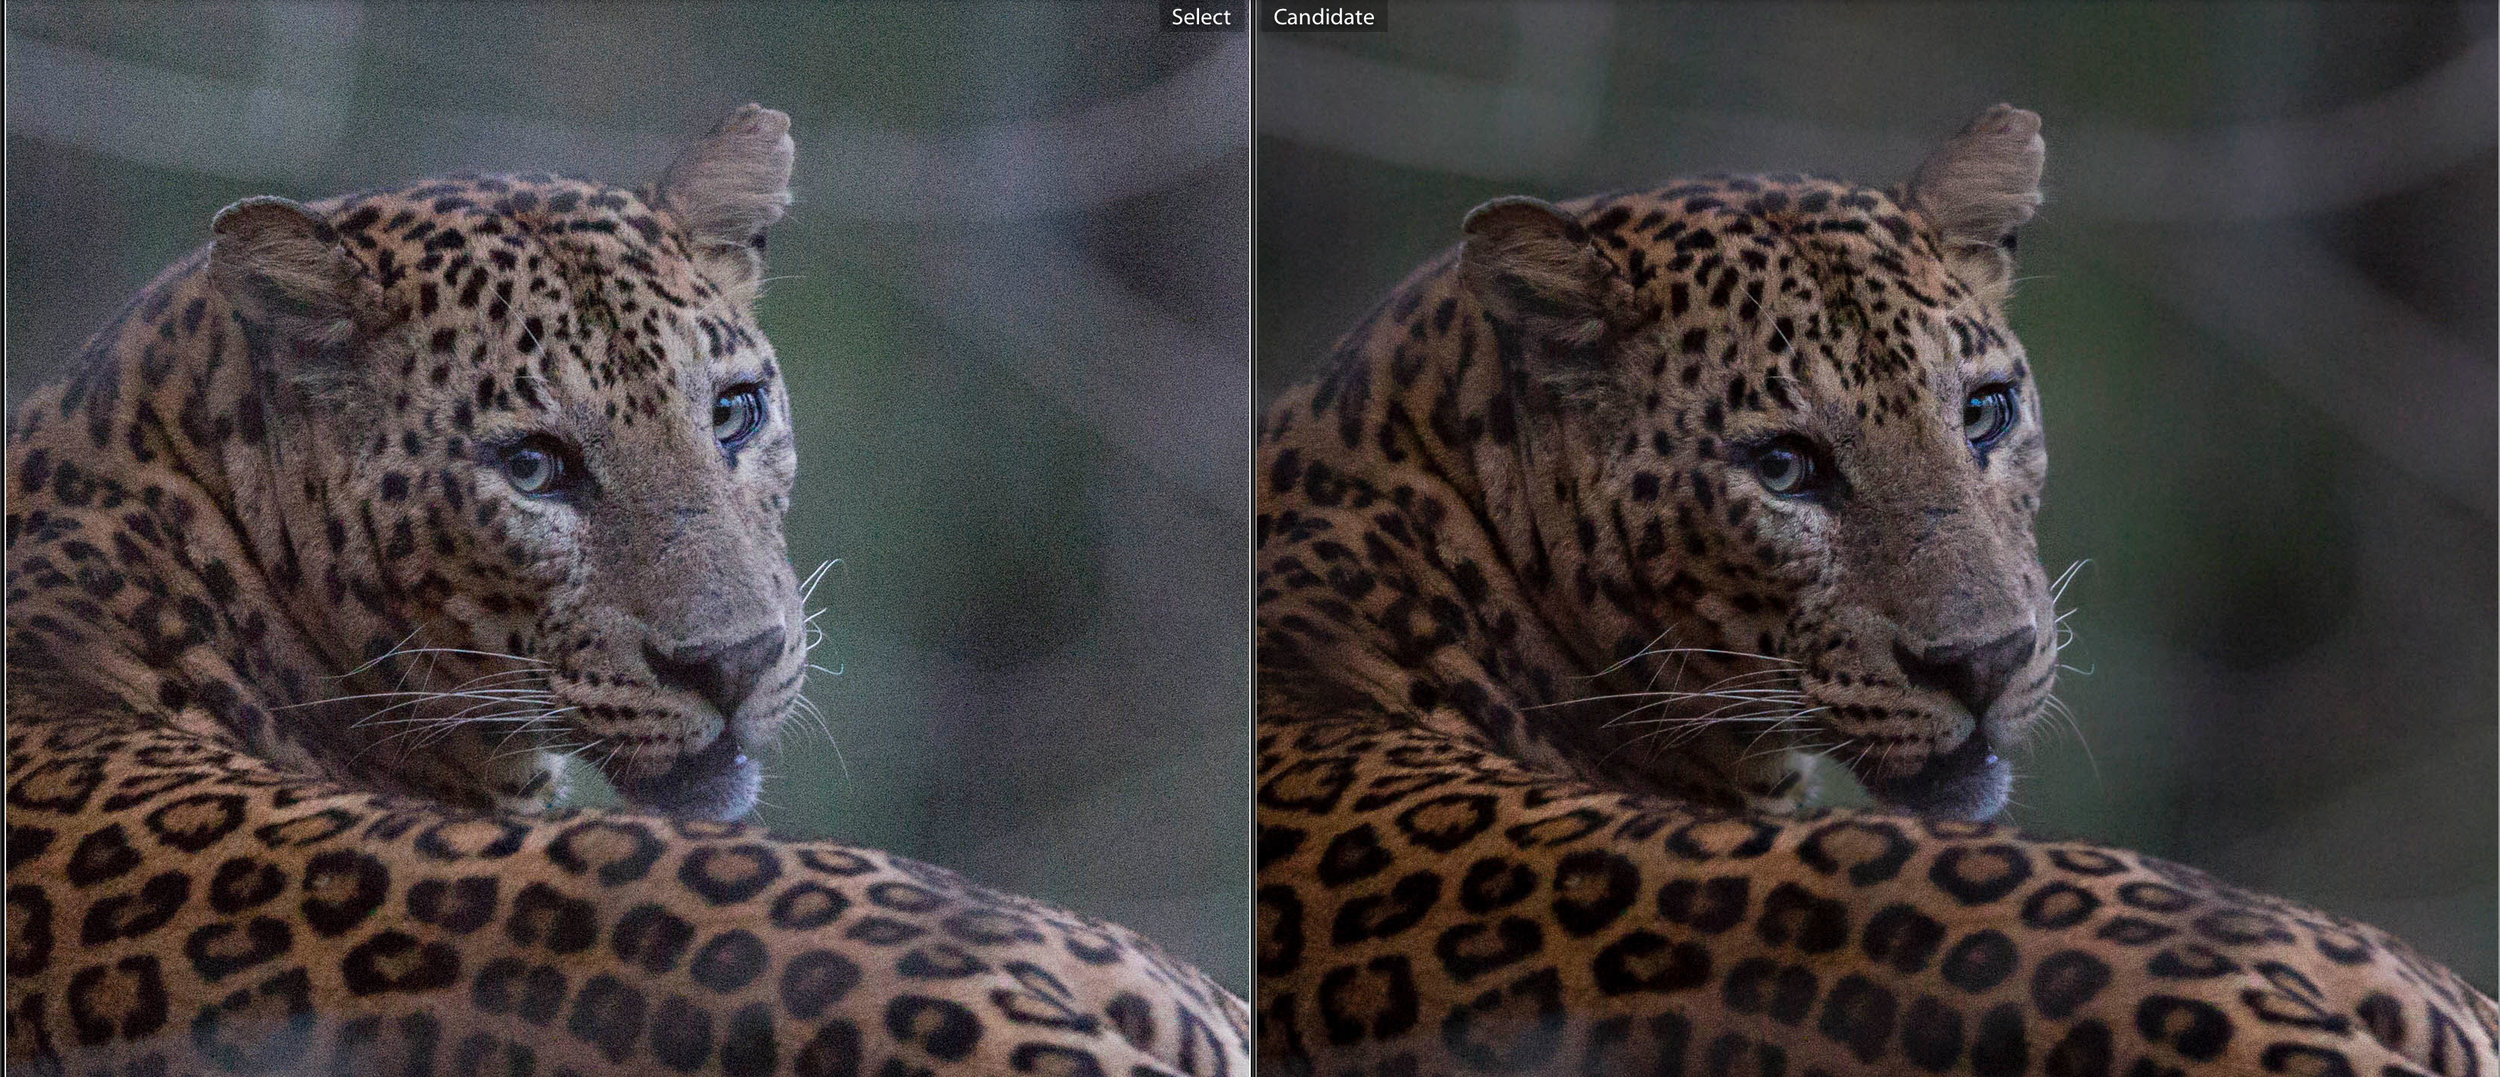
Now you can see what can be done, subtly, I will go through; step by step what I did to get there using Adobe Lightroom CC. The exact values I use in each step may change depending on the image I am processing, as each scene might require different processes, but this is the general method I use.
This method will take me around 5-10 minutes depending on the scene.
I. Exposure
You can see from the histogram that this image is slightly under-exposed, with the majority of curve being on the left side. This was despite the fact I intentionally left it slightly more exposed than the scene (ETTR). The first thing I do with any image is make sure my exposure is how i want it, in this case, it means dropping it slightly to compensate for the ETTR (-0,5) . In doing so, the noise in the dark areas gets lost (slighty). Inversely, if you increase the exposure, even by as little as half a stop (+0,5) you will see more noise. Check out the gallery below and let me know if you agree.
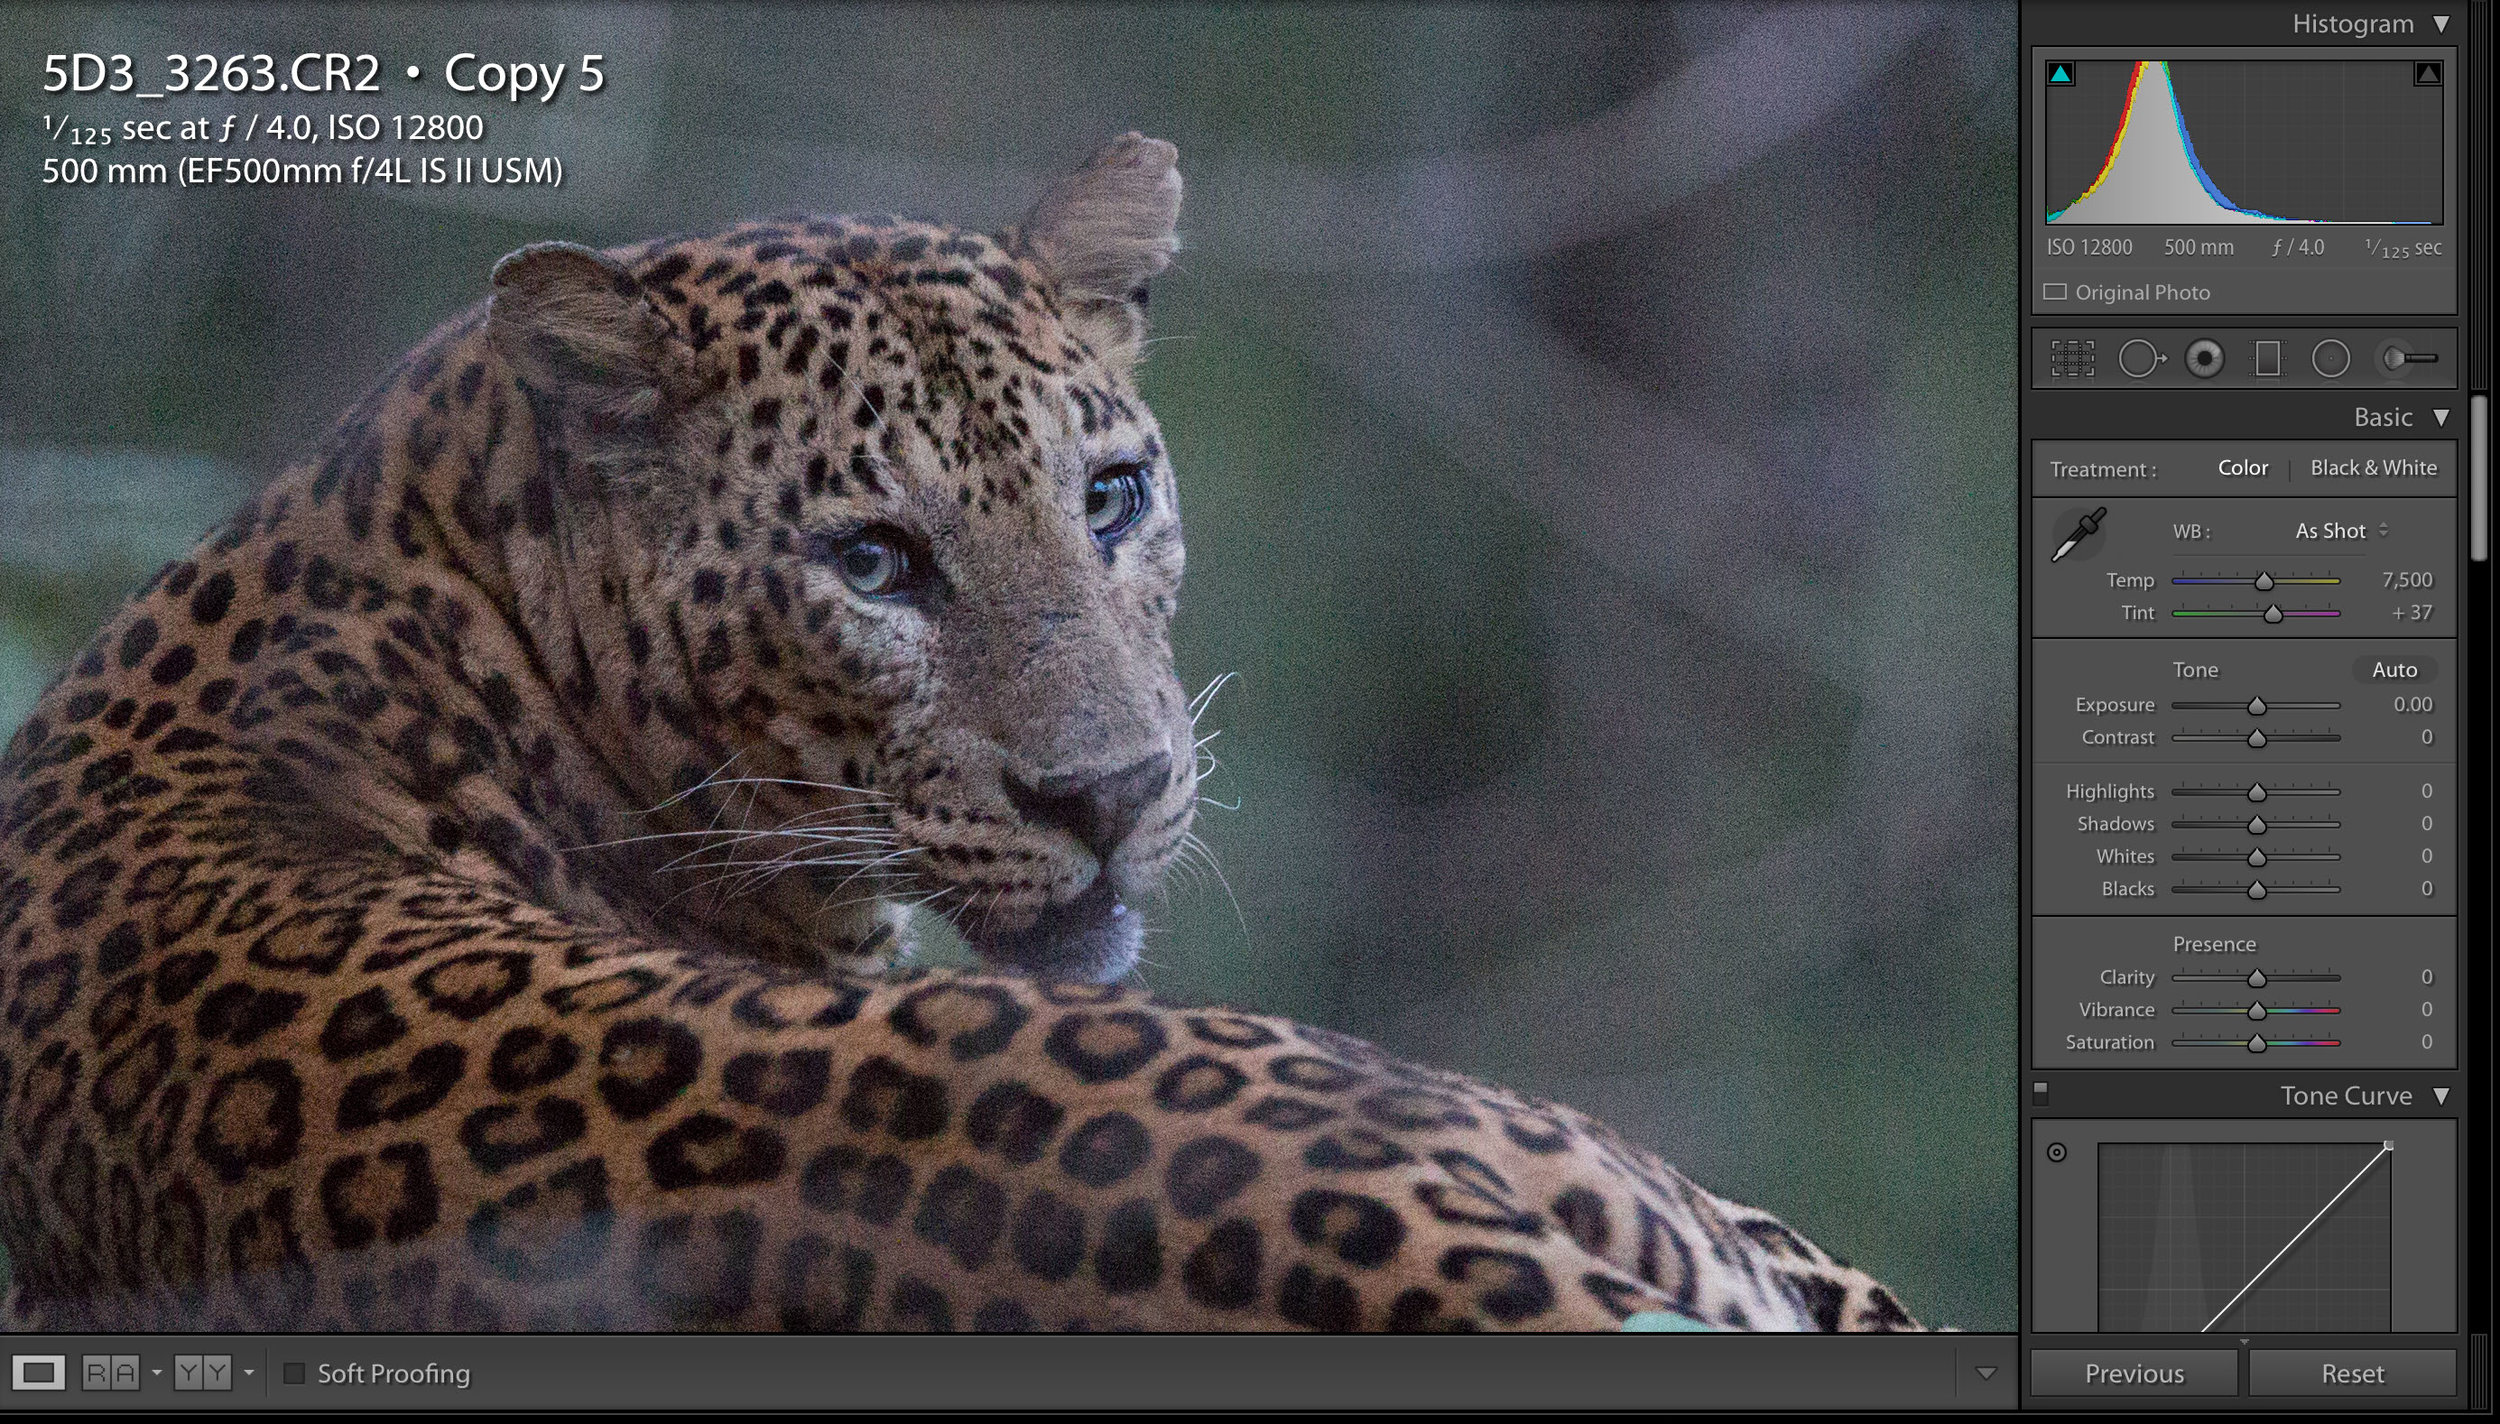
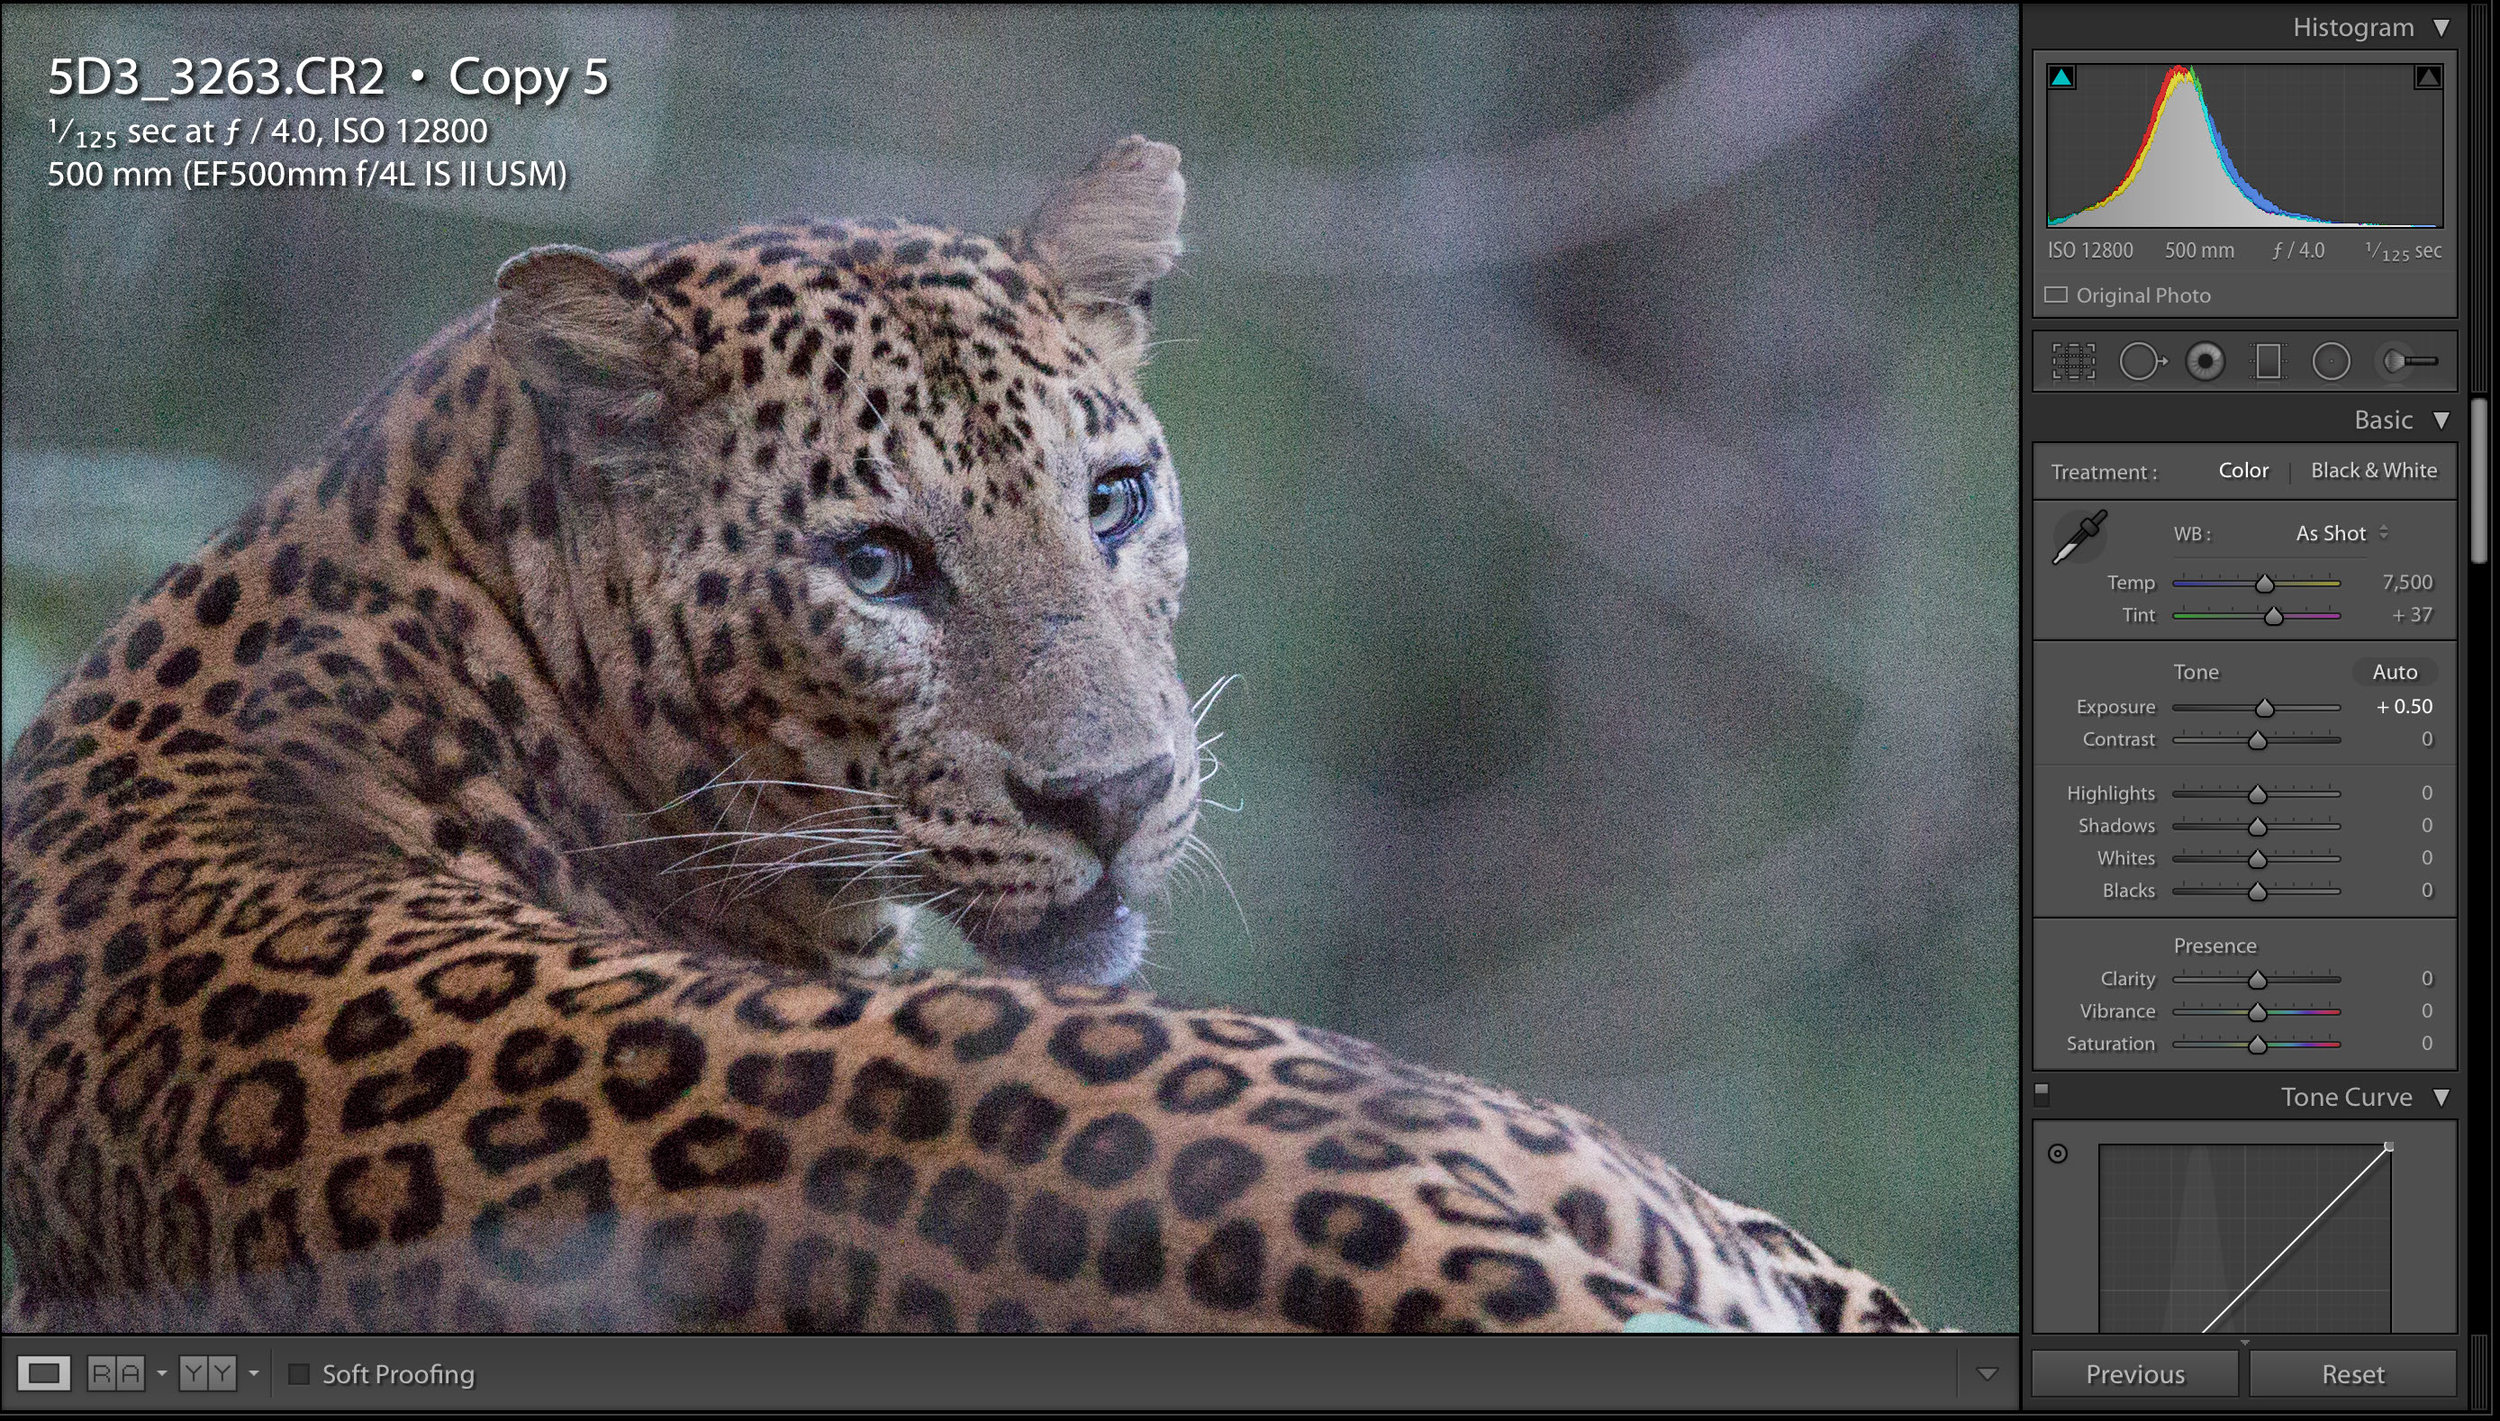
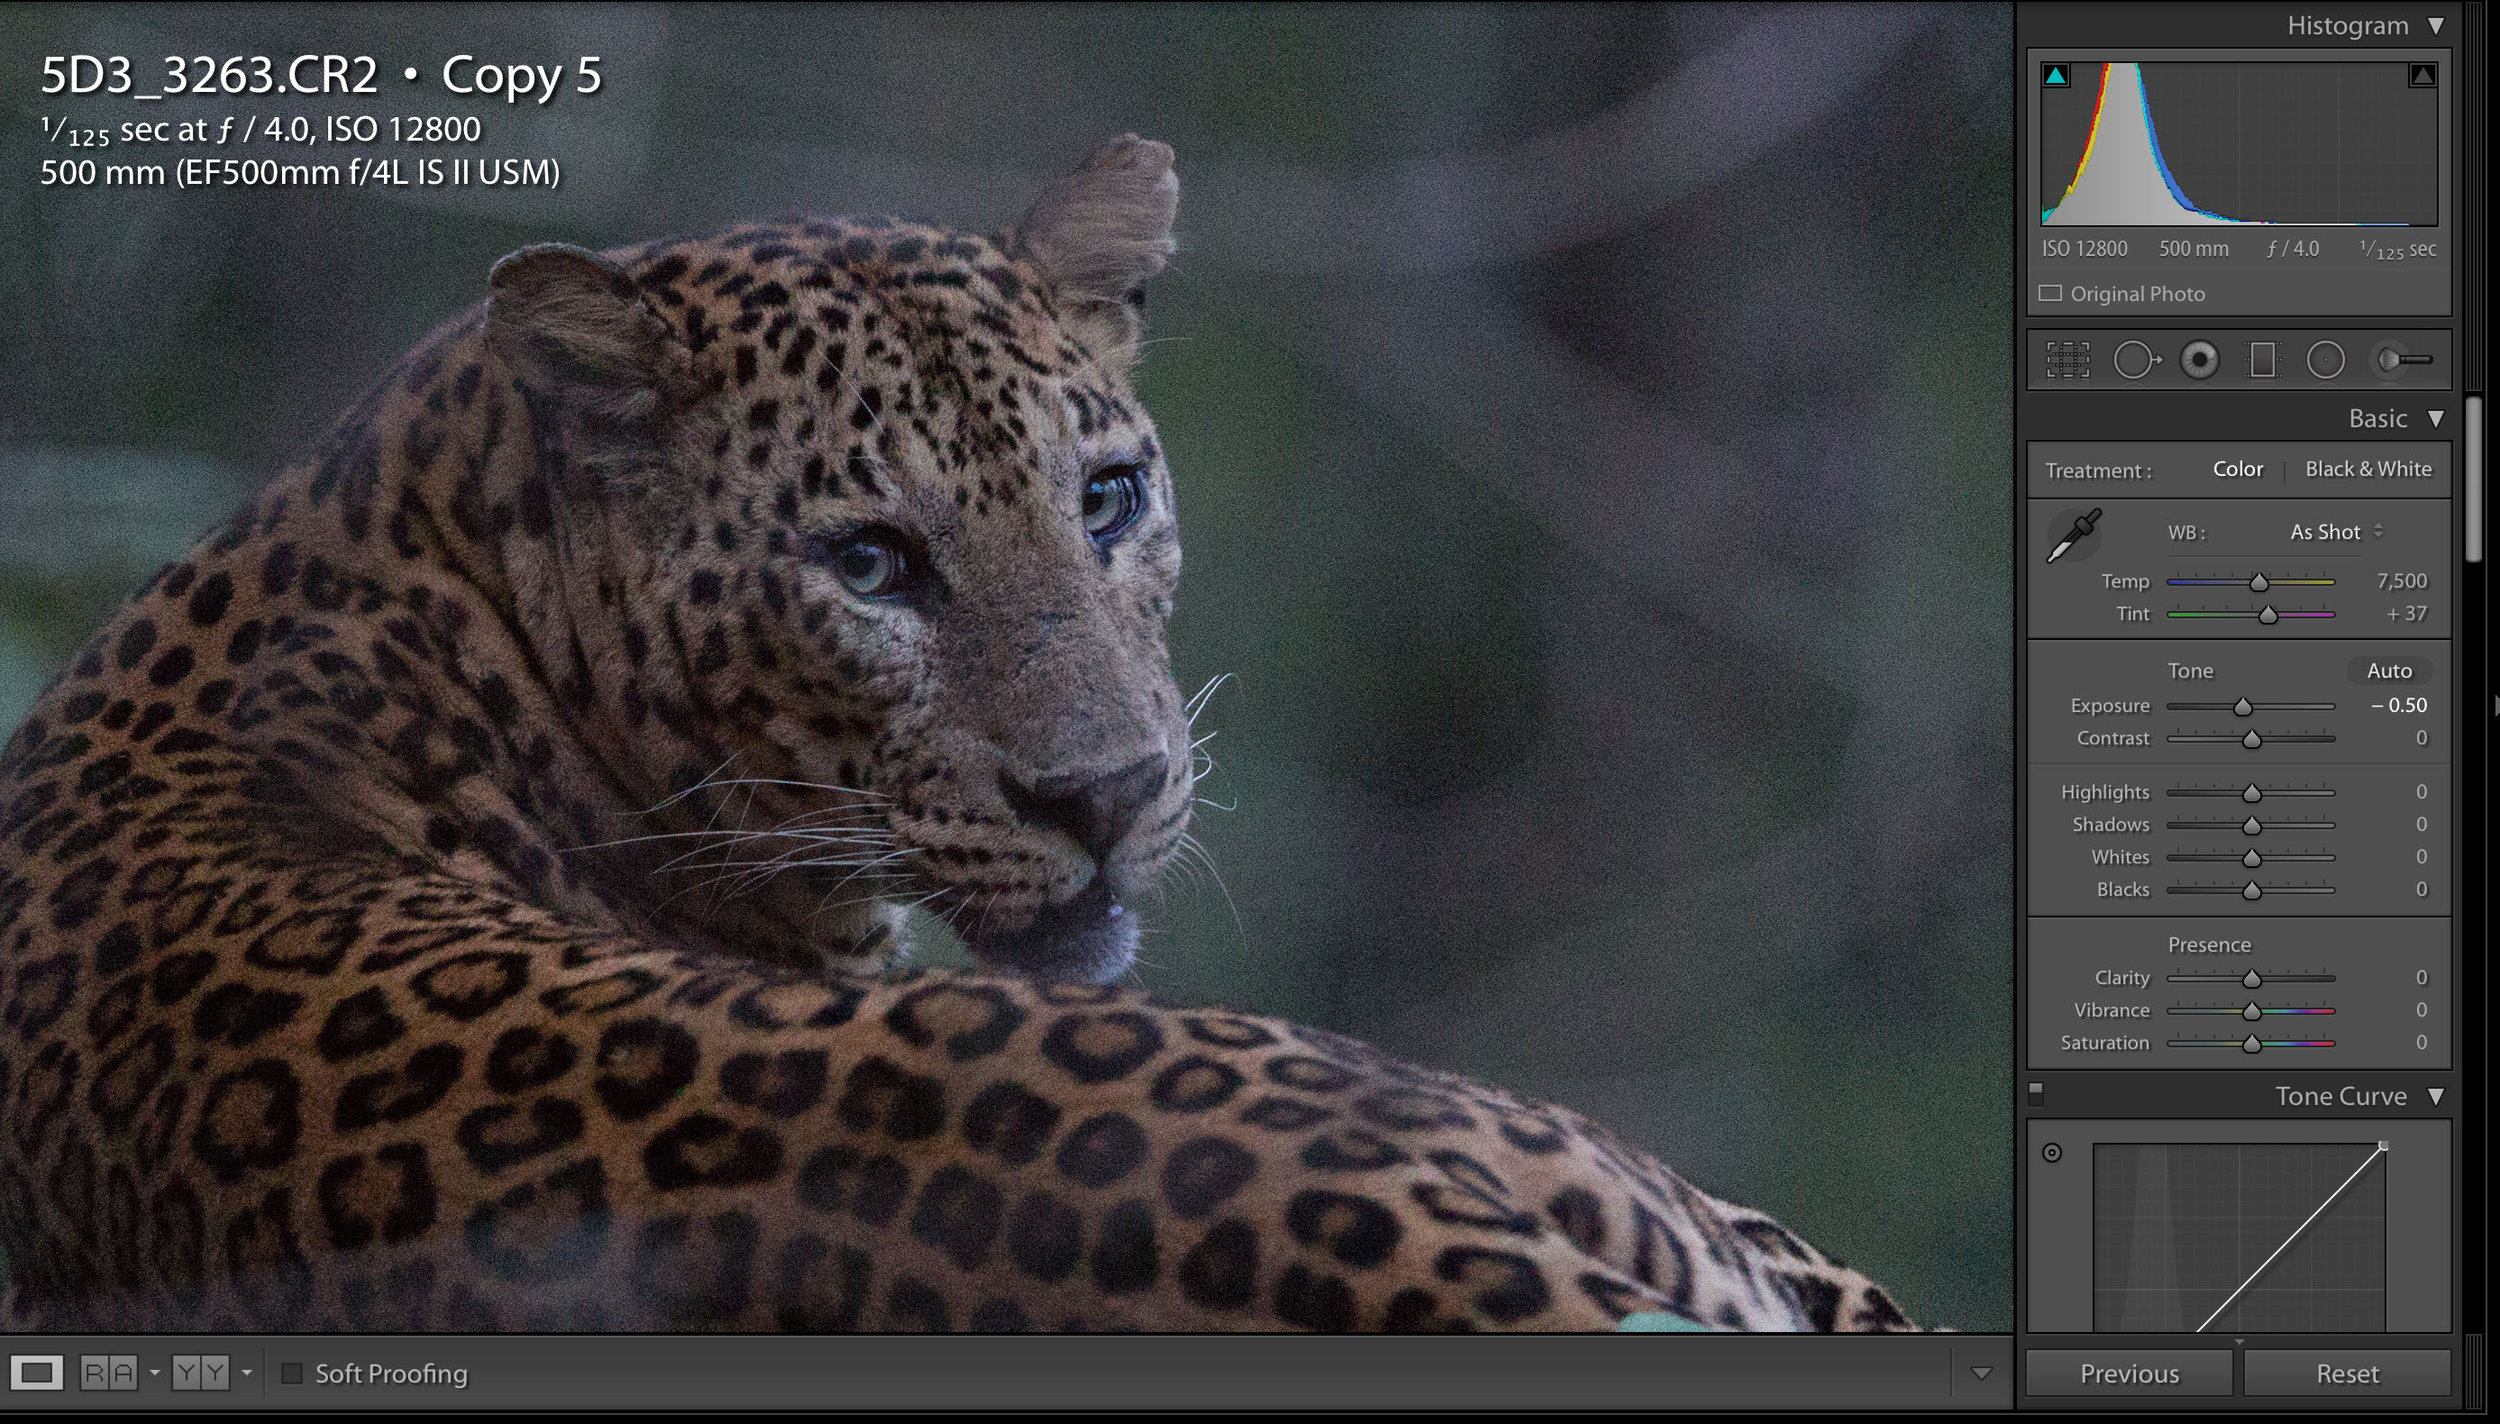
So, I now have a correctly exposed image reflecting the scene and reduced the noise slightly in one go.
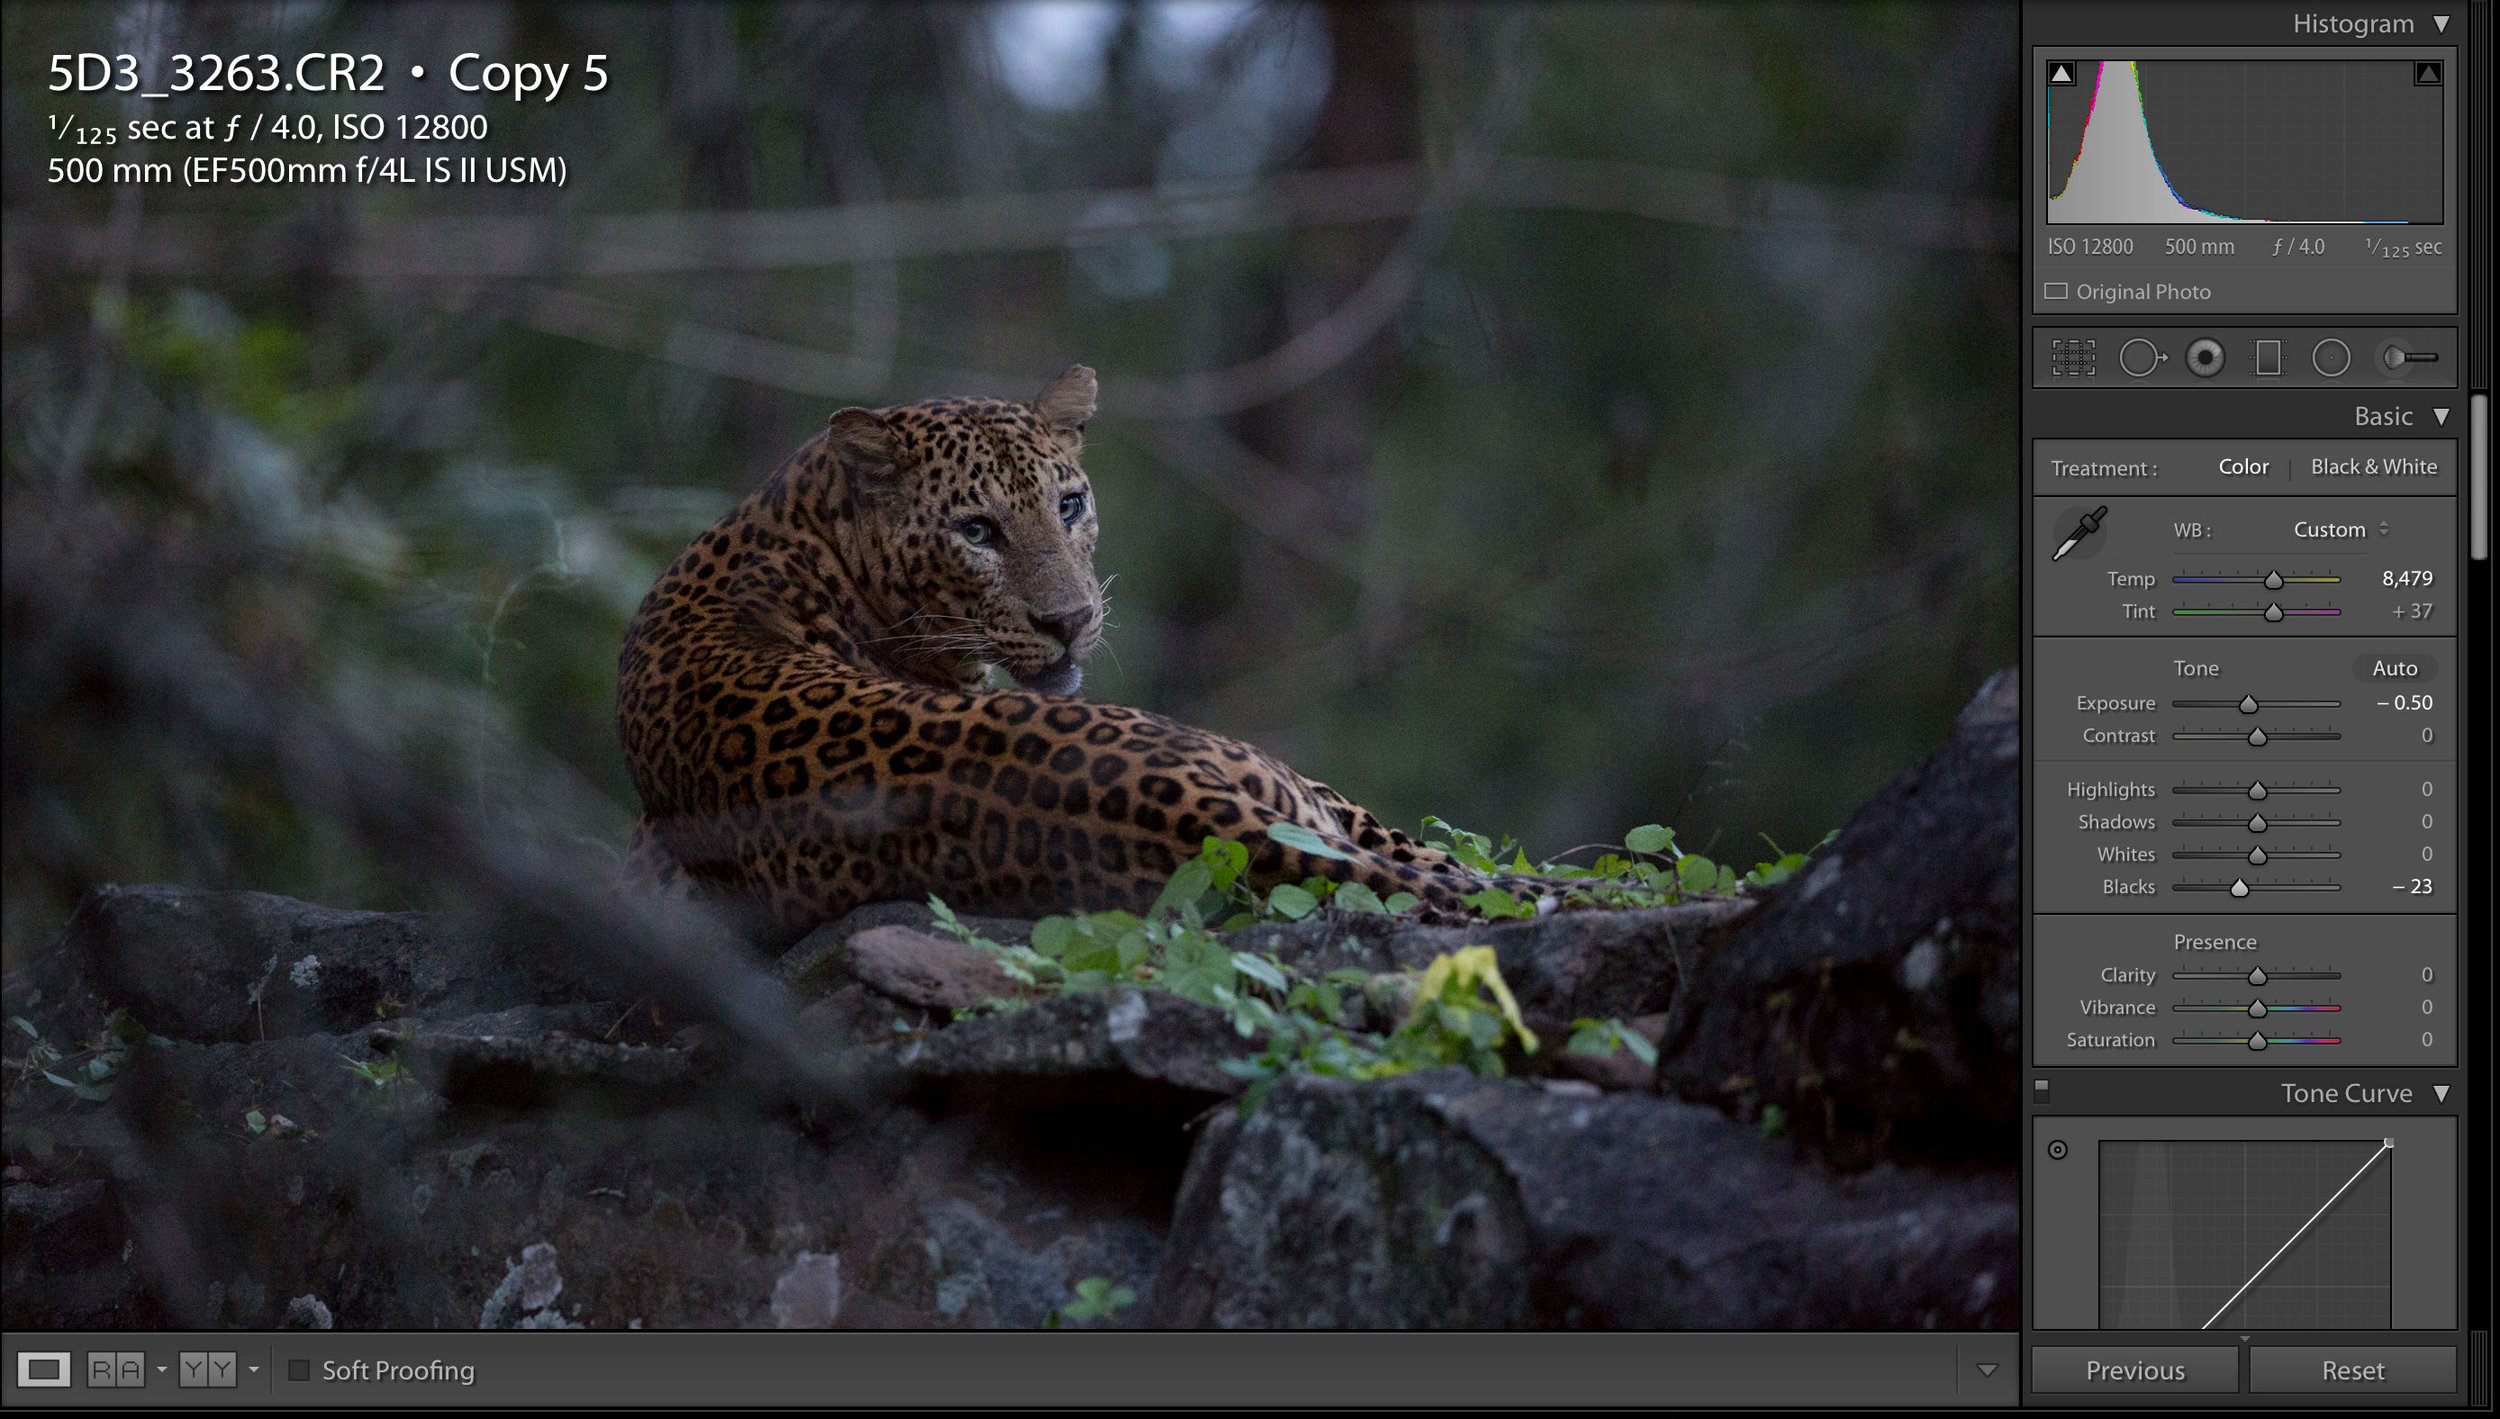
II. White Balance
High ISO is used in low light (generally). Us humans don't see colour in low light due to the different types of photo-receptors in our eyes having different light sensitivities (our low-light photo-receptors in our eyes can only see in black and white). So I find that often in low light, I need to tweak the WB to reflect the scene better.
When changing the white balance you need to look at the scene as a whole.
III. Blacks/whites
We loose dynamic range as the ISO increases. So by adjusting the blacks and whites in the image, one can re-introduce some. In this case, there were no whites, but you can see by crushing the blacks some, the image pop.

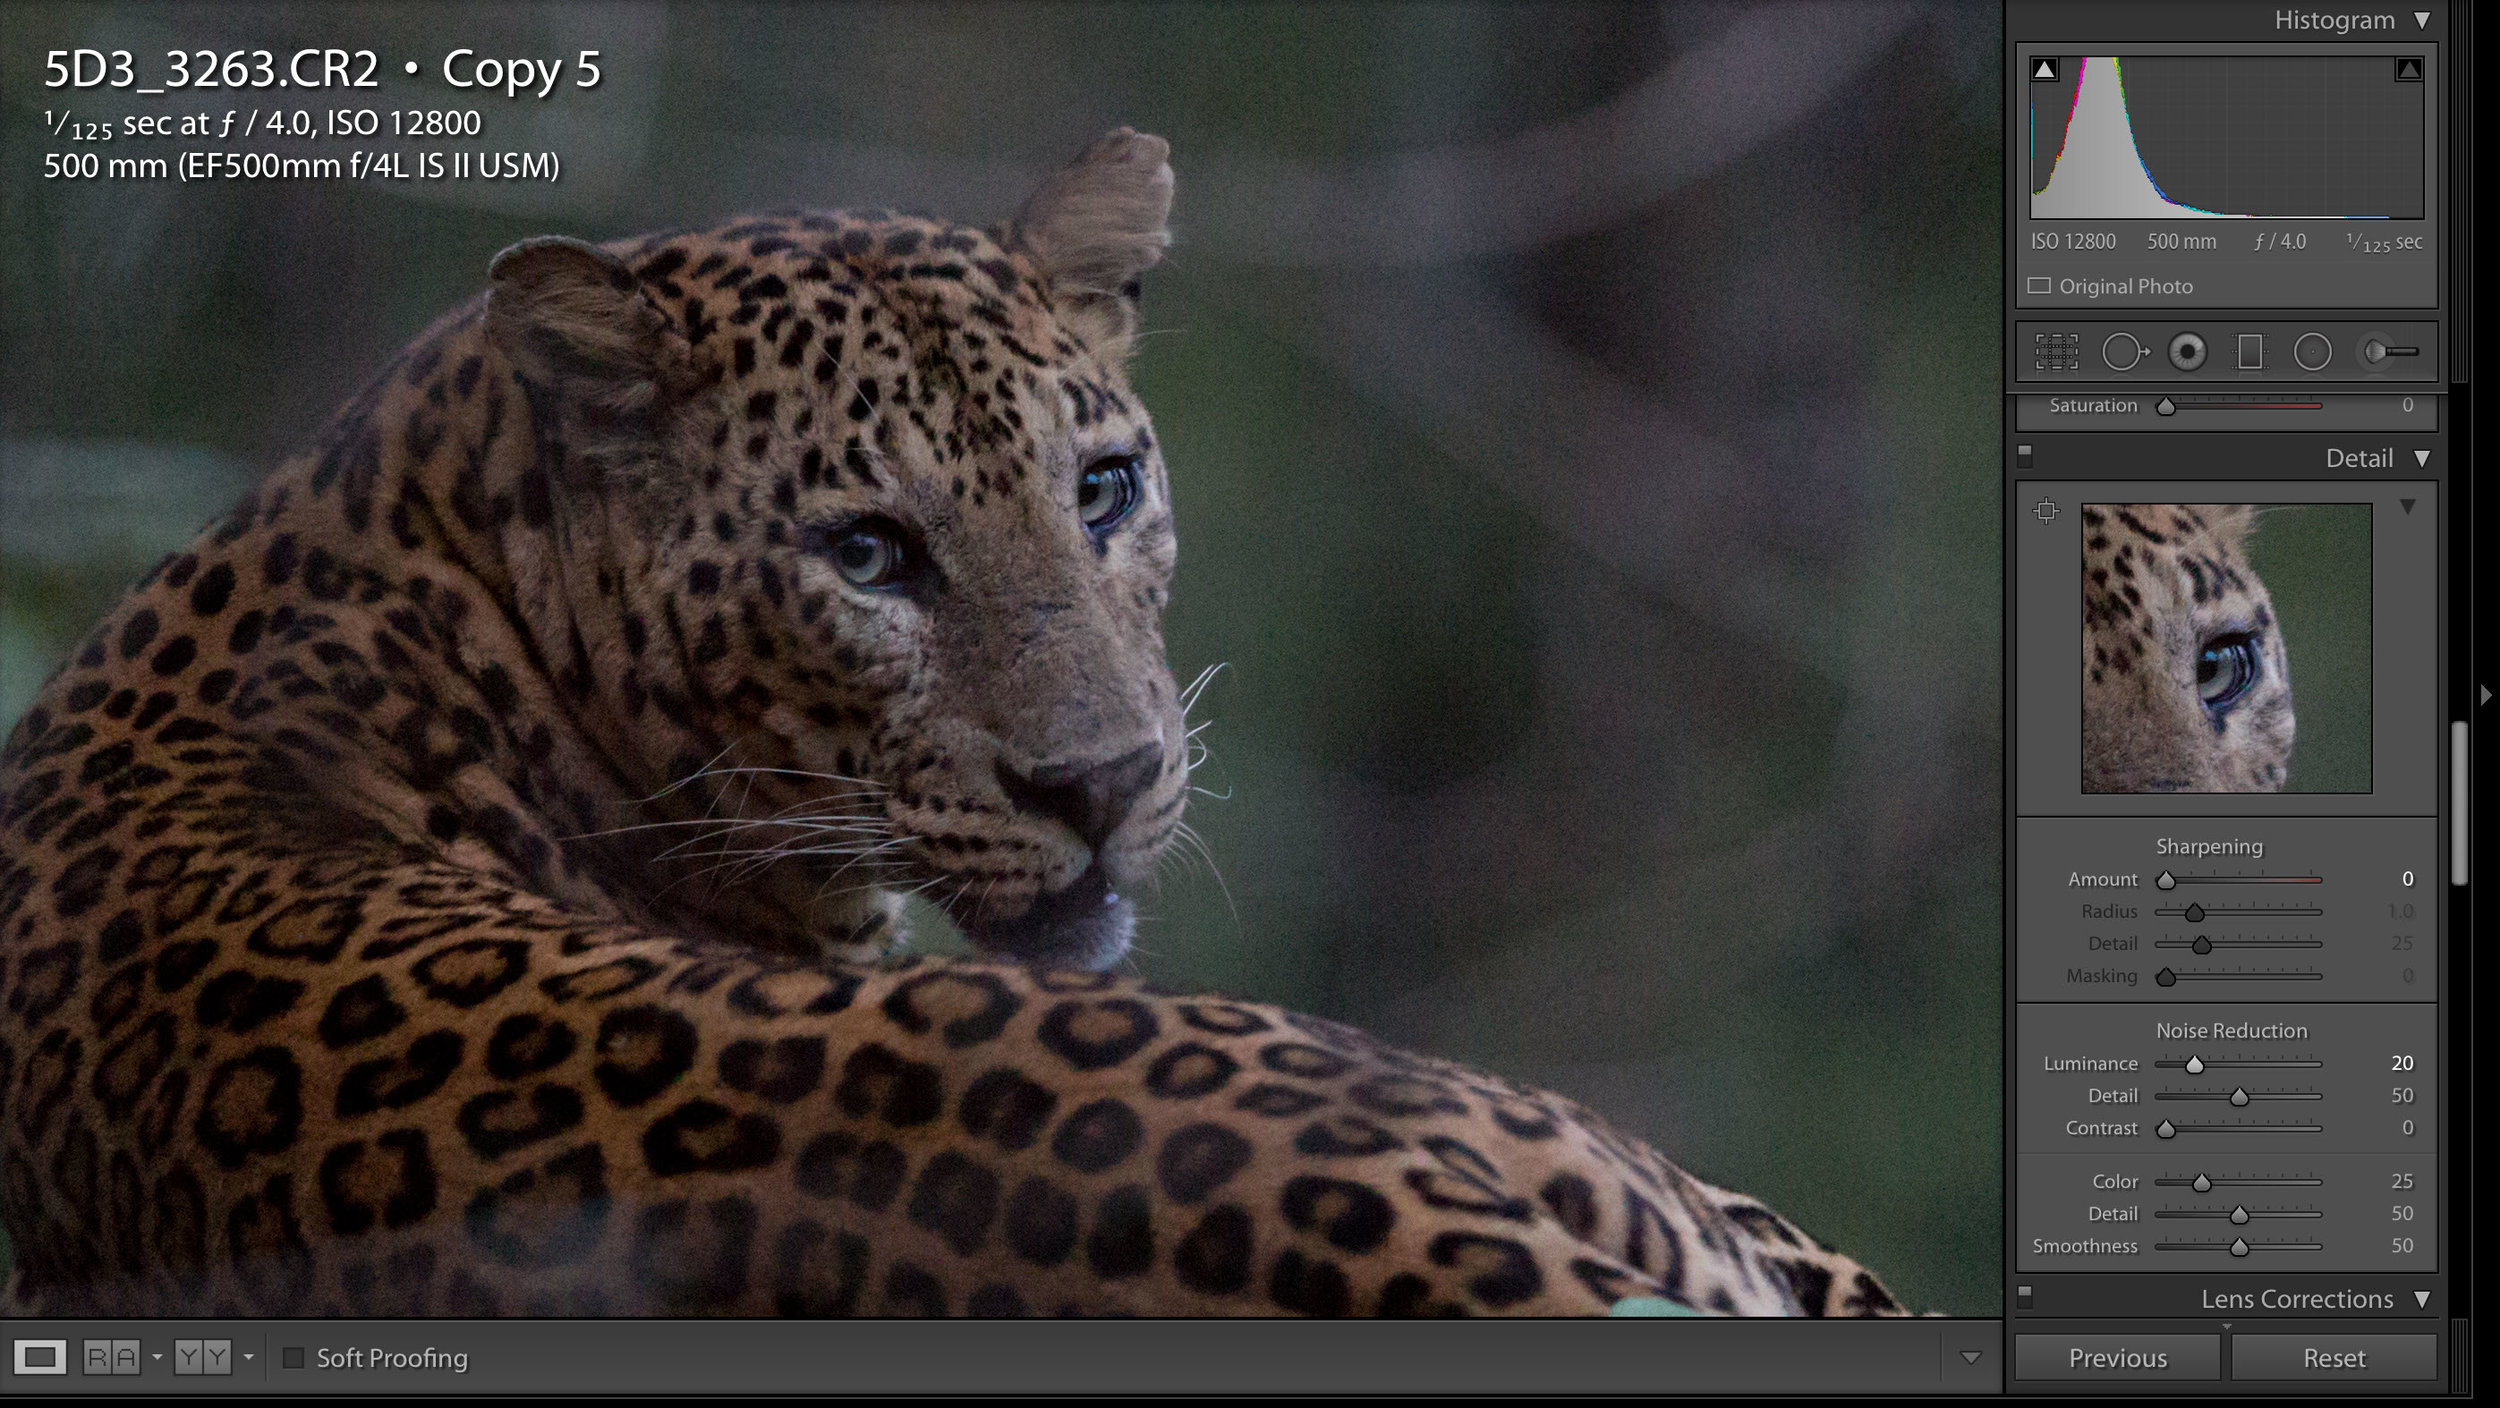
IV. Noise Reduction
Not surprisingly, this is a larger section. :) Now we have the basics of the image looking how we want, we now have to try and deal with all that high ISO noise. Lightroom automatically adds sharpening and colour noise reduction to all RAW images. In general, I don't touch them, but when dealing with high ISO images, I turn off any sharpening at this stage. Sharpening BEFORE you remove unwanted noise just enhances the noise. I also removed the automatic Colour Noise.
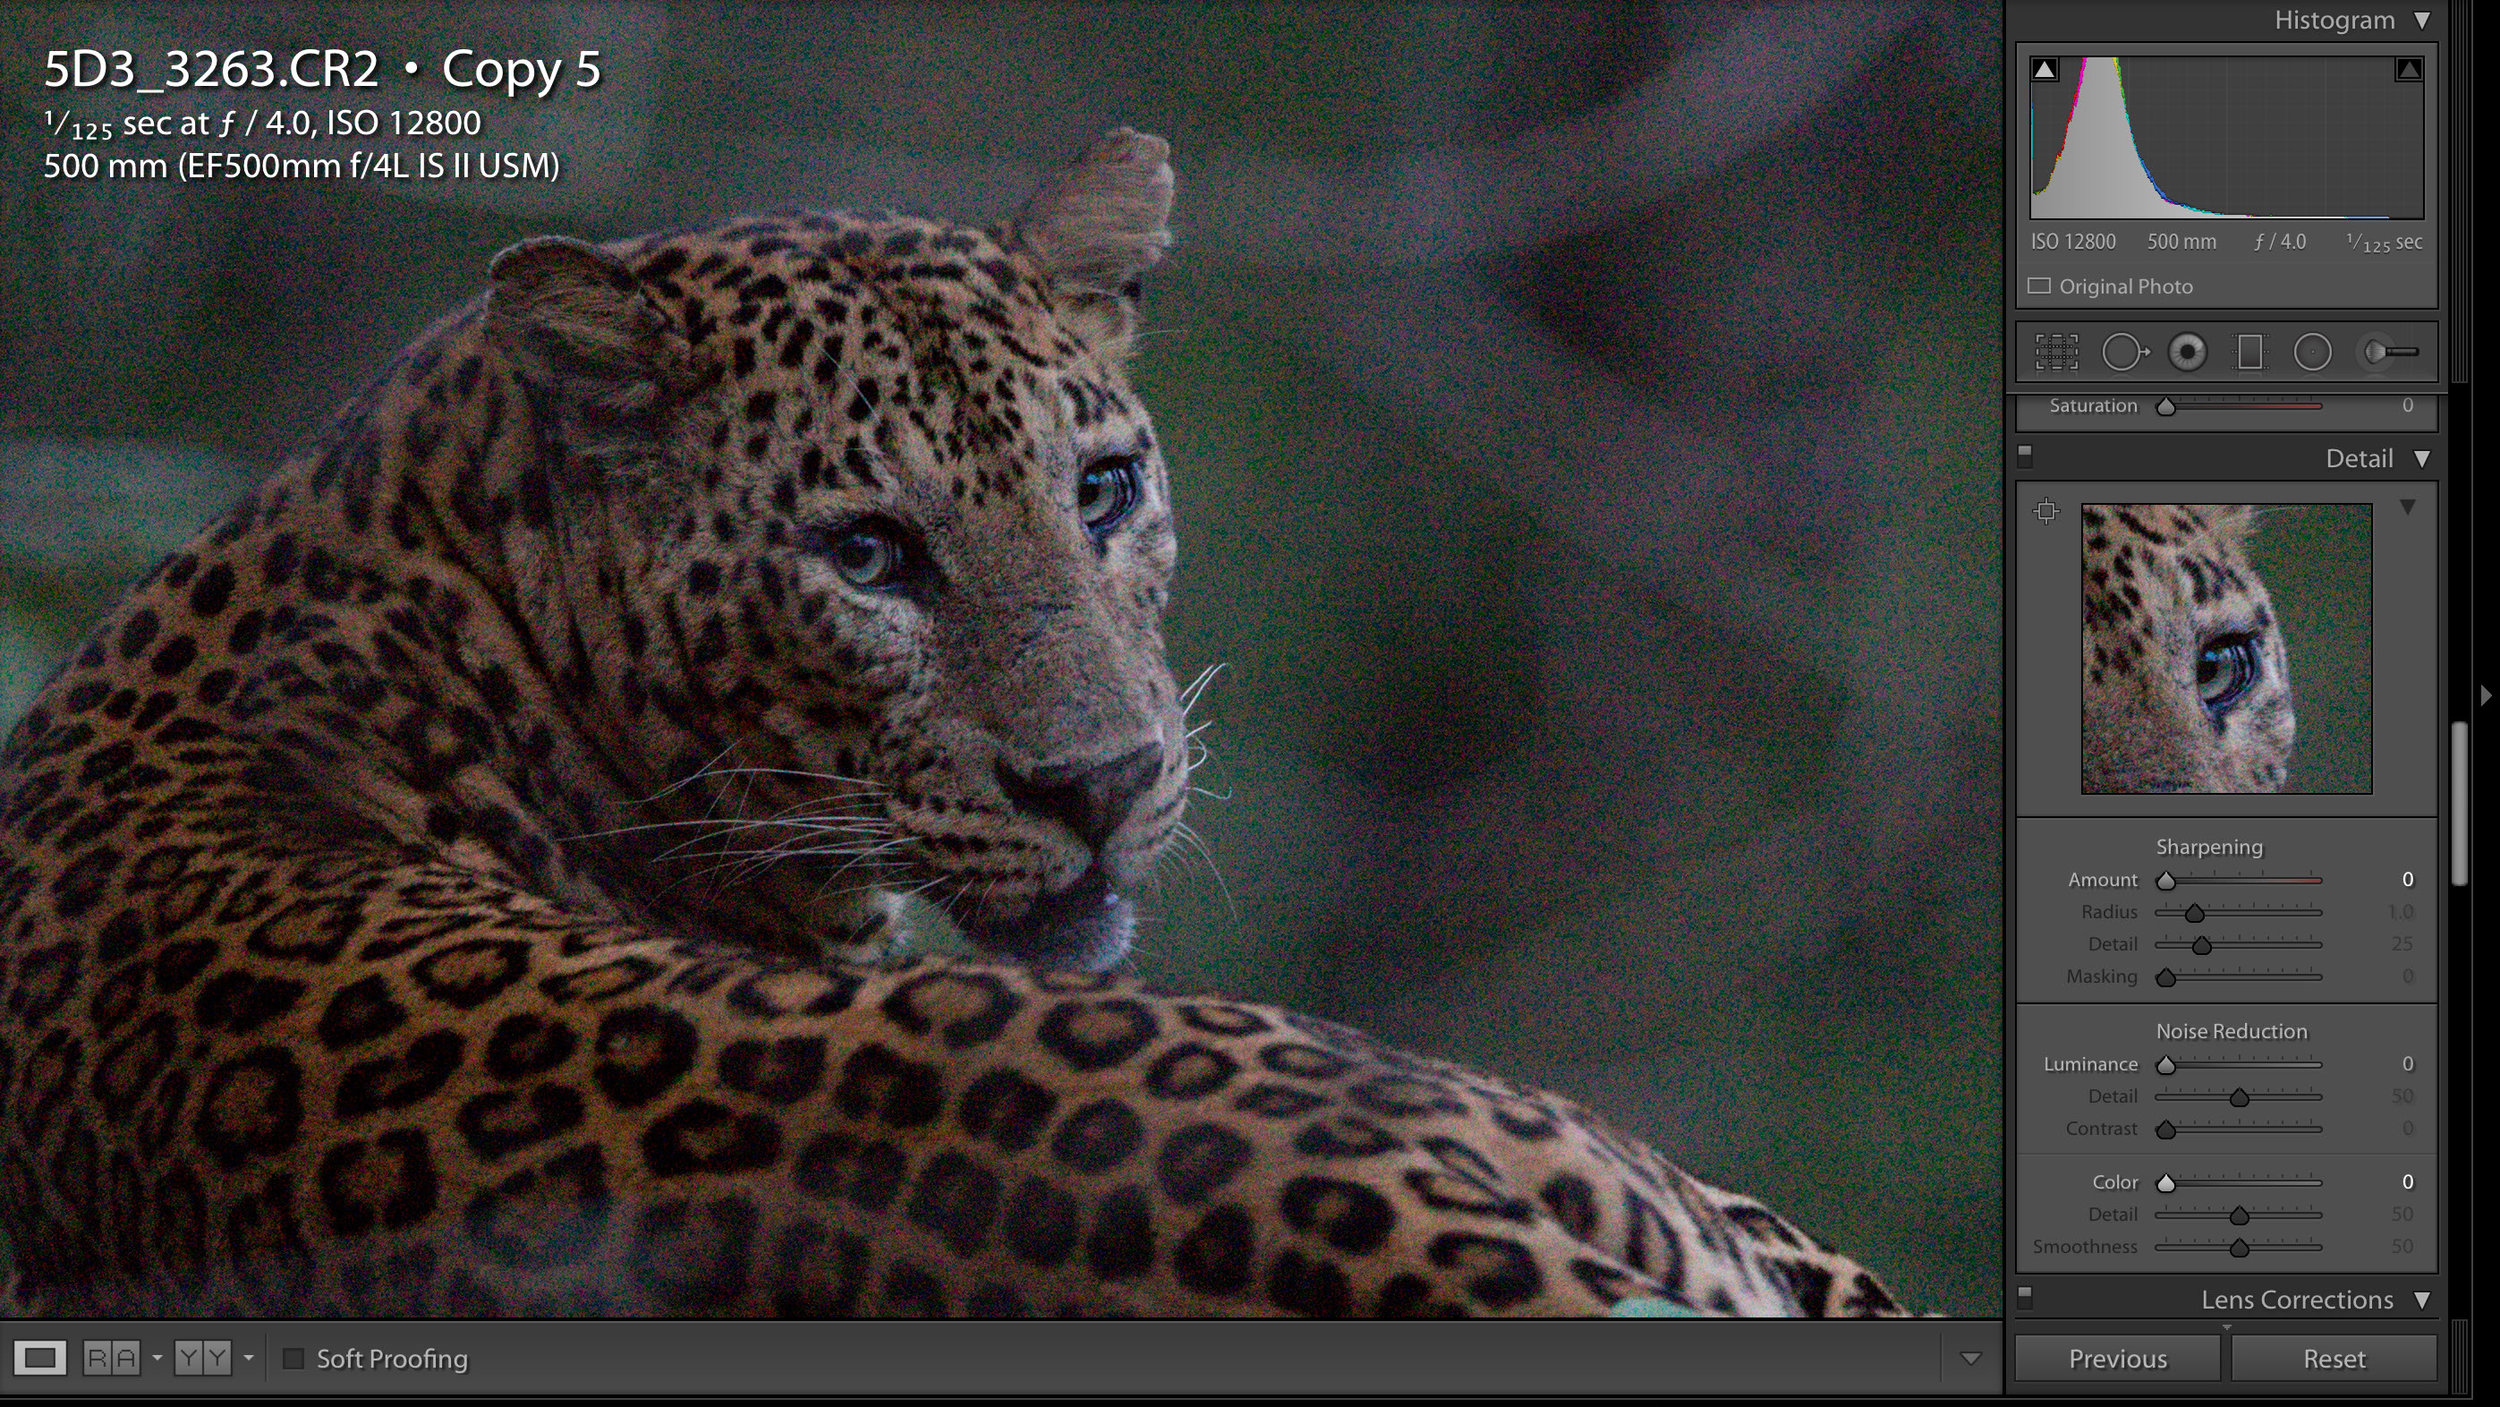
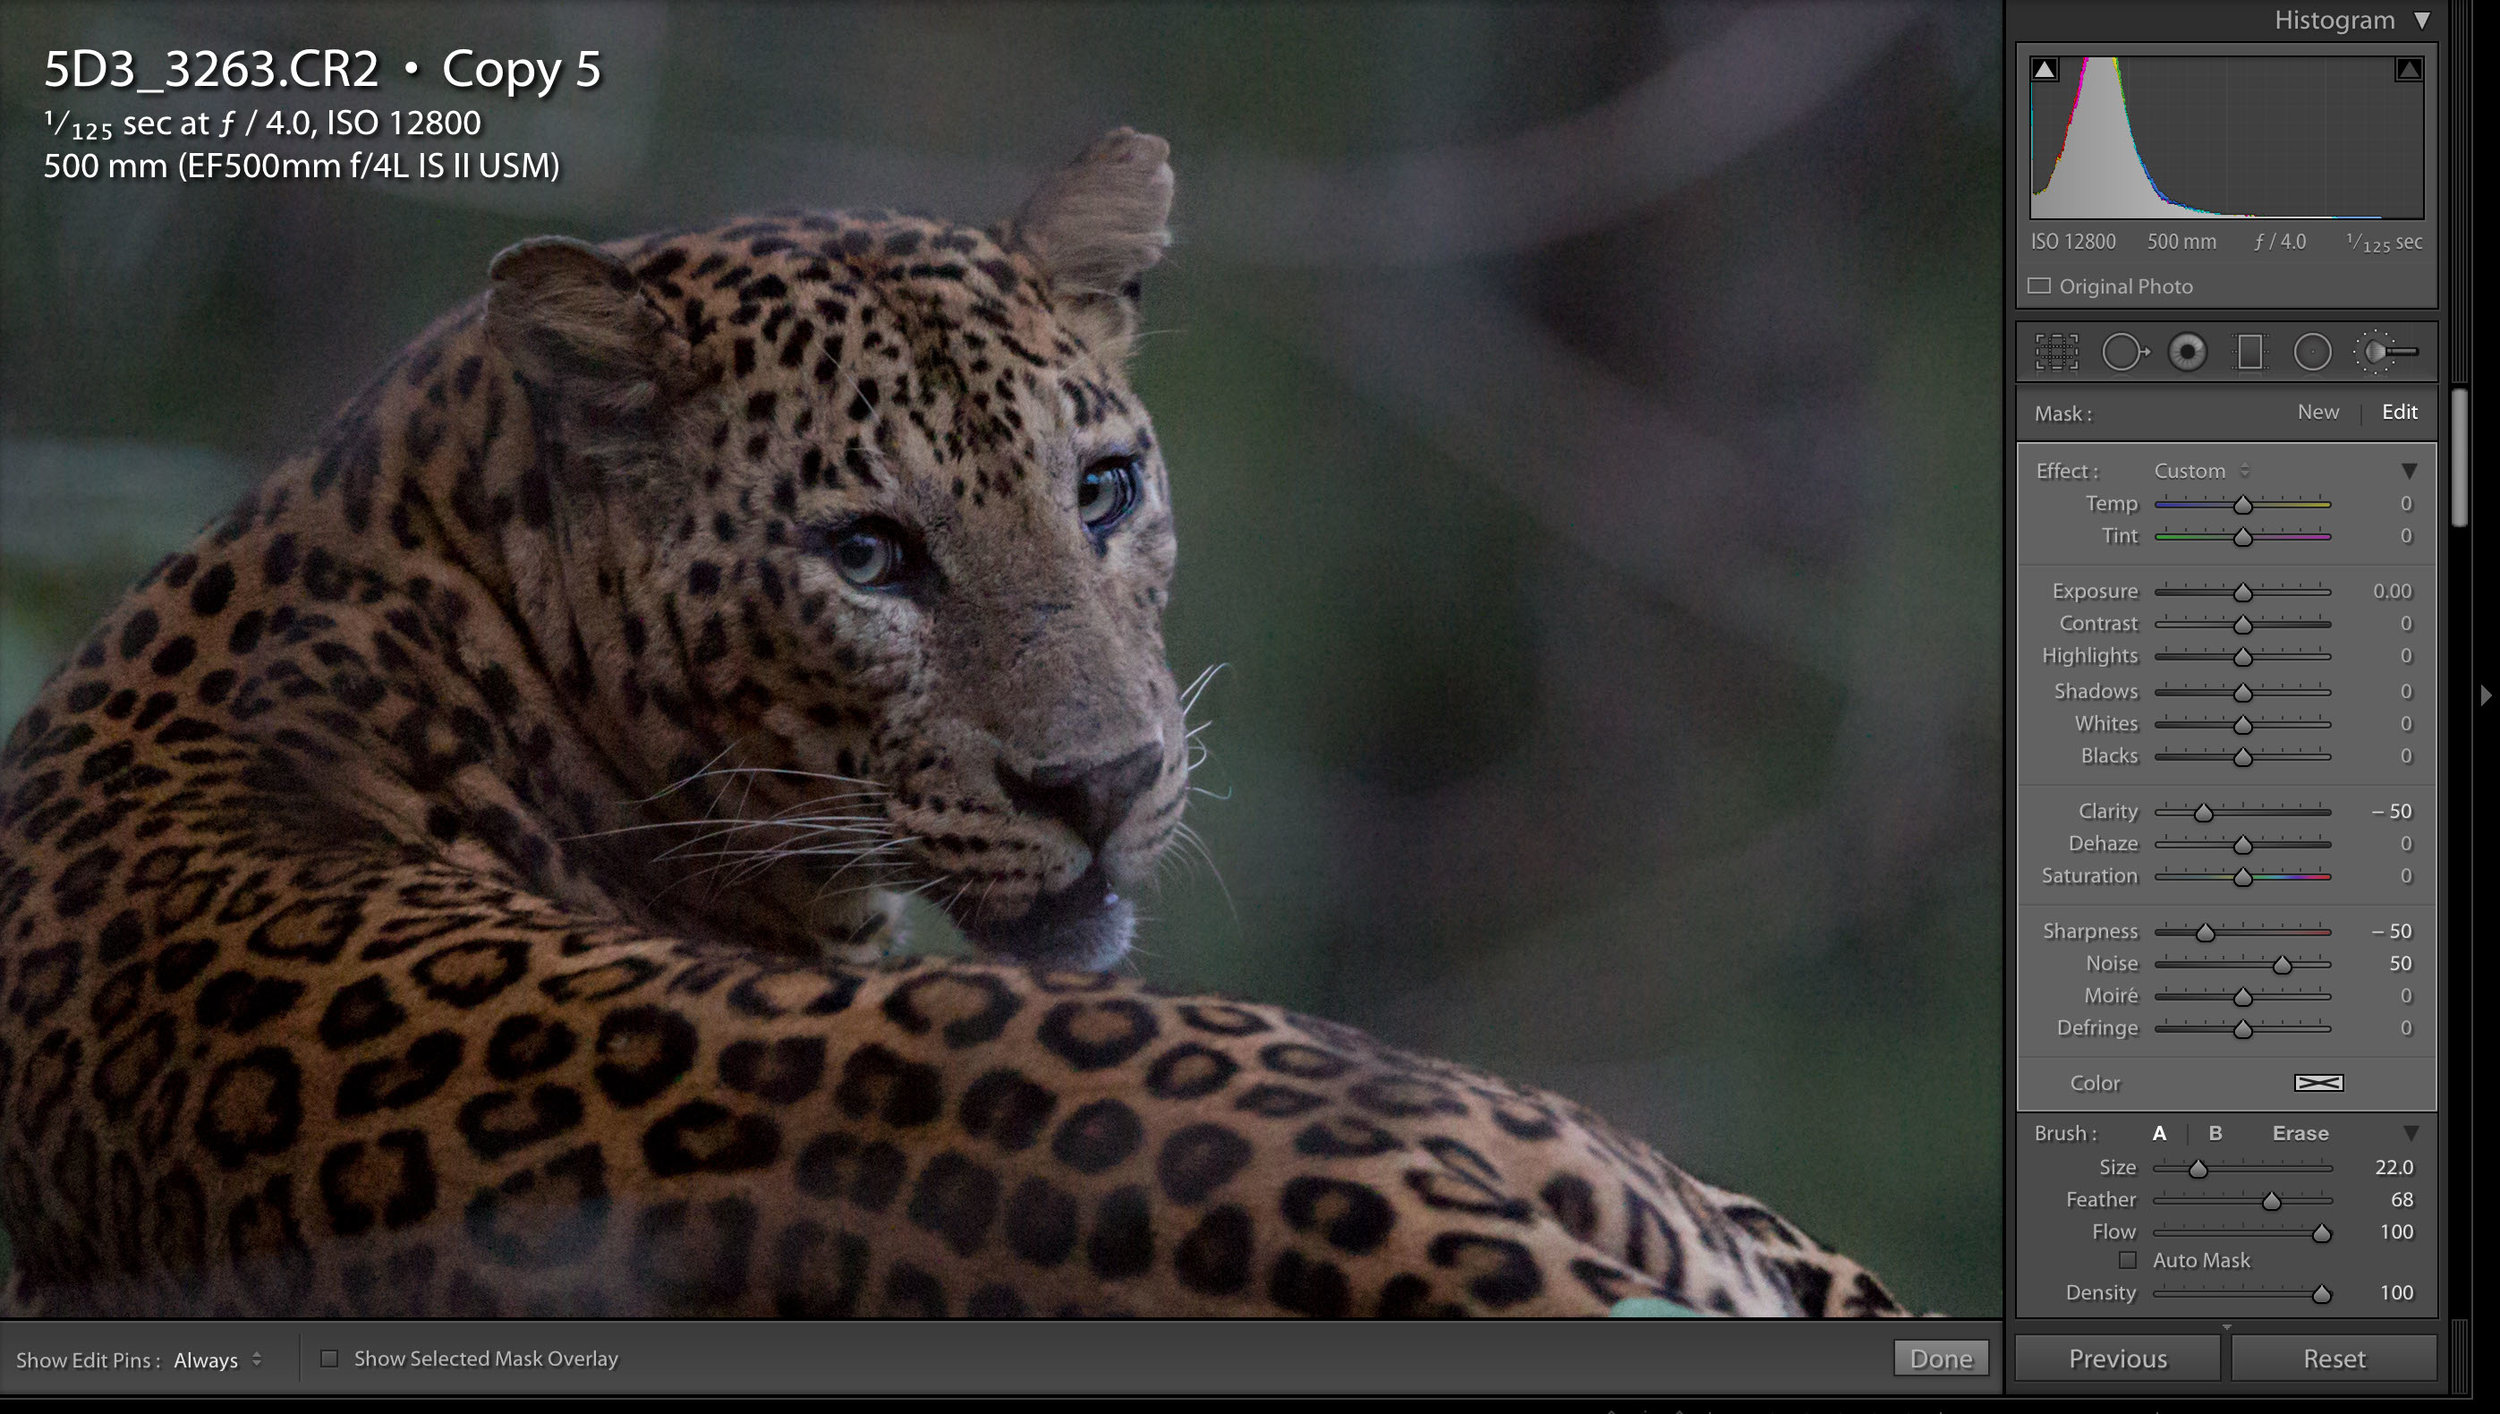
Image with the automatic sharpening and colour noise reduction applied
Image when you remove the automatic settings and the starting point for the noise reduction process
Colour noise
Colour noise is exactly that... noise that has colour. I am lucky that I have a good camera and colour noise is not so much of an issue. In fact just by putting the default automatic colour noise reduction value back, it disappears. But this might not be the case for all scenes or cameras, so you will first need to play with this get rid as much as you can with the lowest setting you can. remember at higher ISOs, there is less room to push the processing... so always go for the minimal change required.

Luminance
Luminance noise is the biggest problem, and is also the most delicate step. If you increase the noise reduction here too much you will get a completely noiseless image with lovely smooth areas, but you will also loose all the detail and texture in the image. So you will have to play with it to get the MINIMUM value that gets rid of the worst. Don't try and get rid of it all, as this kind of global noise-reduction will make your image look like plastic... just check out the image with 100% noise-reduction applied... it makes me shiver! so be gentle, I would not recommend anything over 40ish, and for this one I only added 20!!!
So when playing here, I suggest increasing the amount while keeping an eye on a detailed portion of you image, and stop before you feel you are loosing too much of the detail... we want to keep the detail, and don't worry, we have not finished removing the noise yet! :)


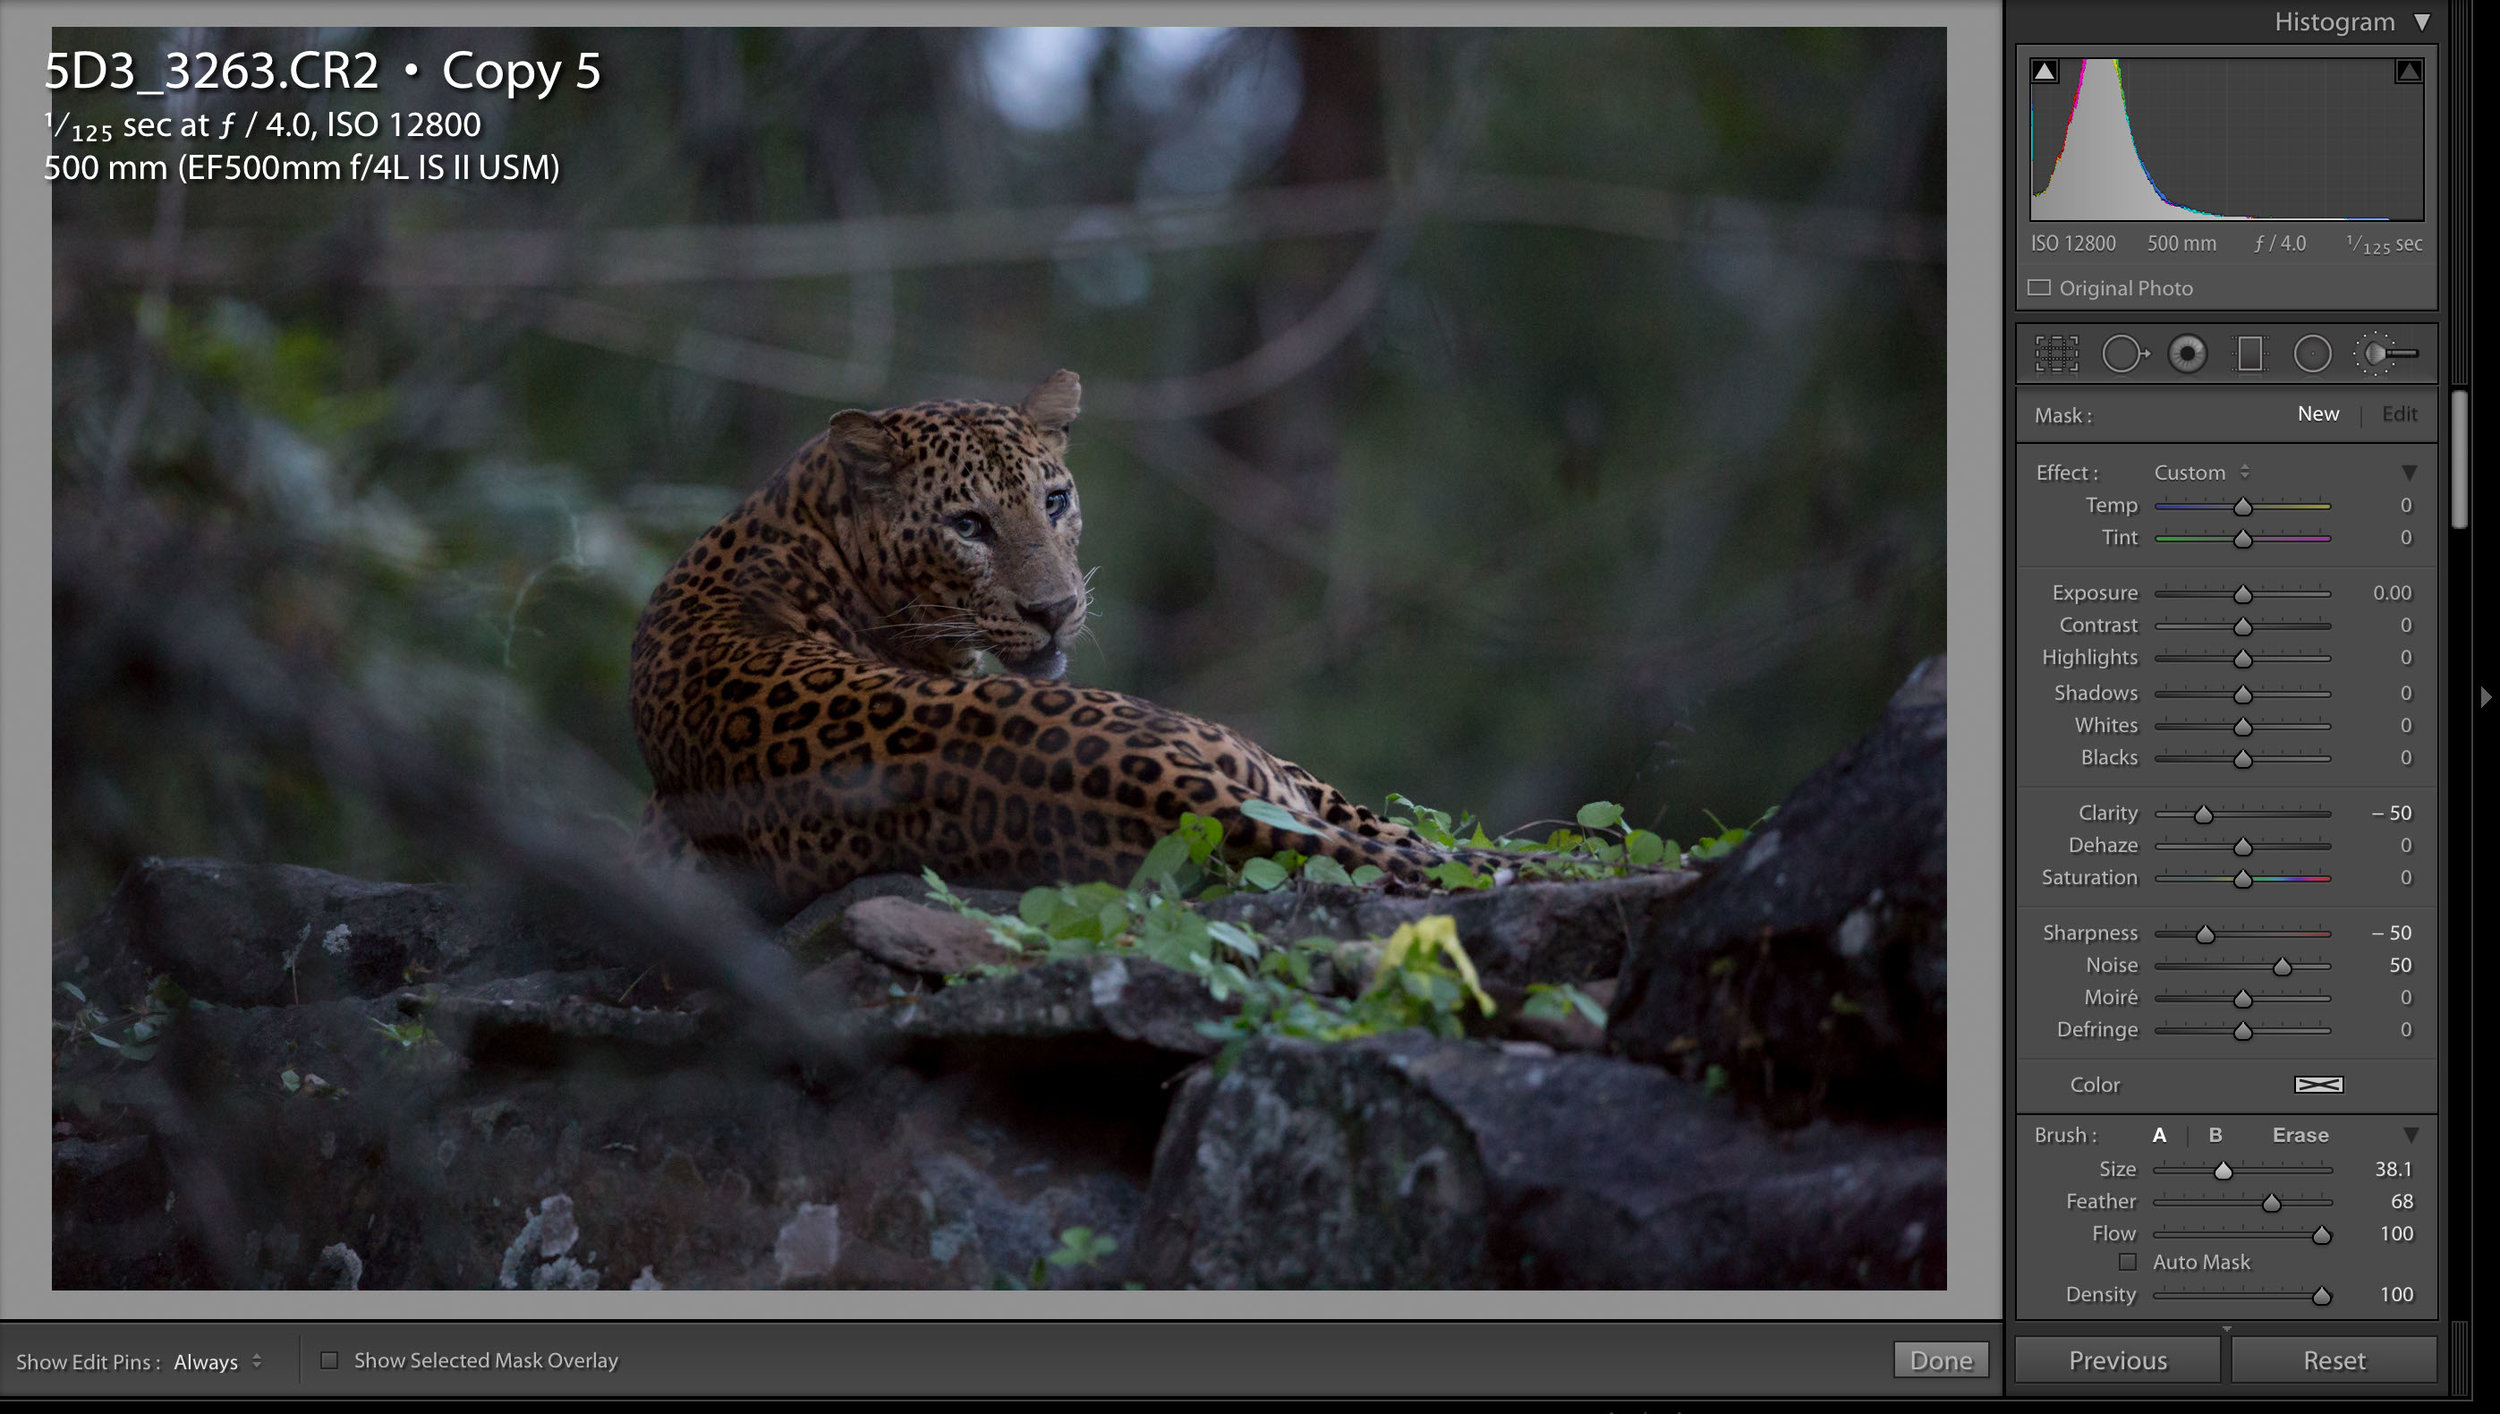
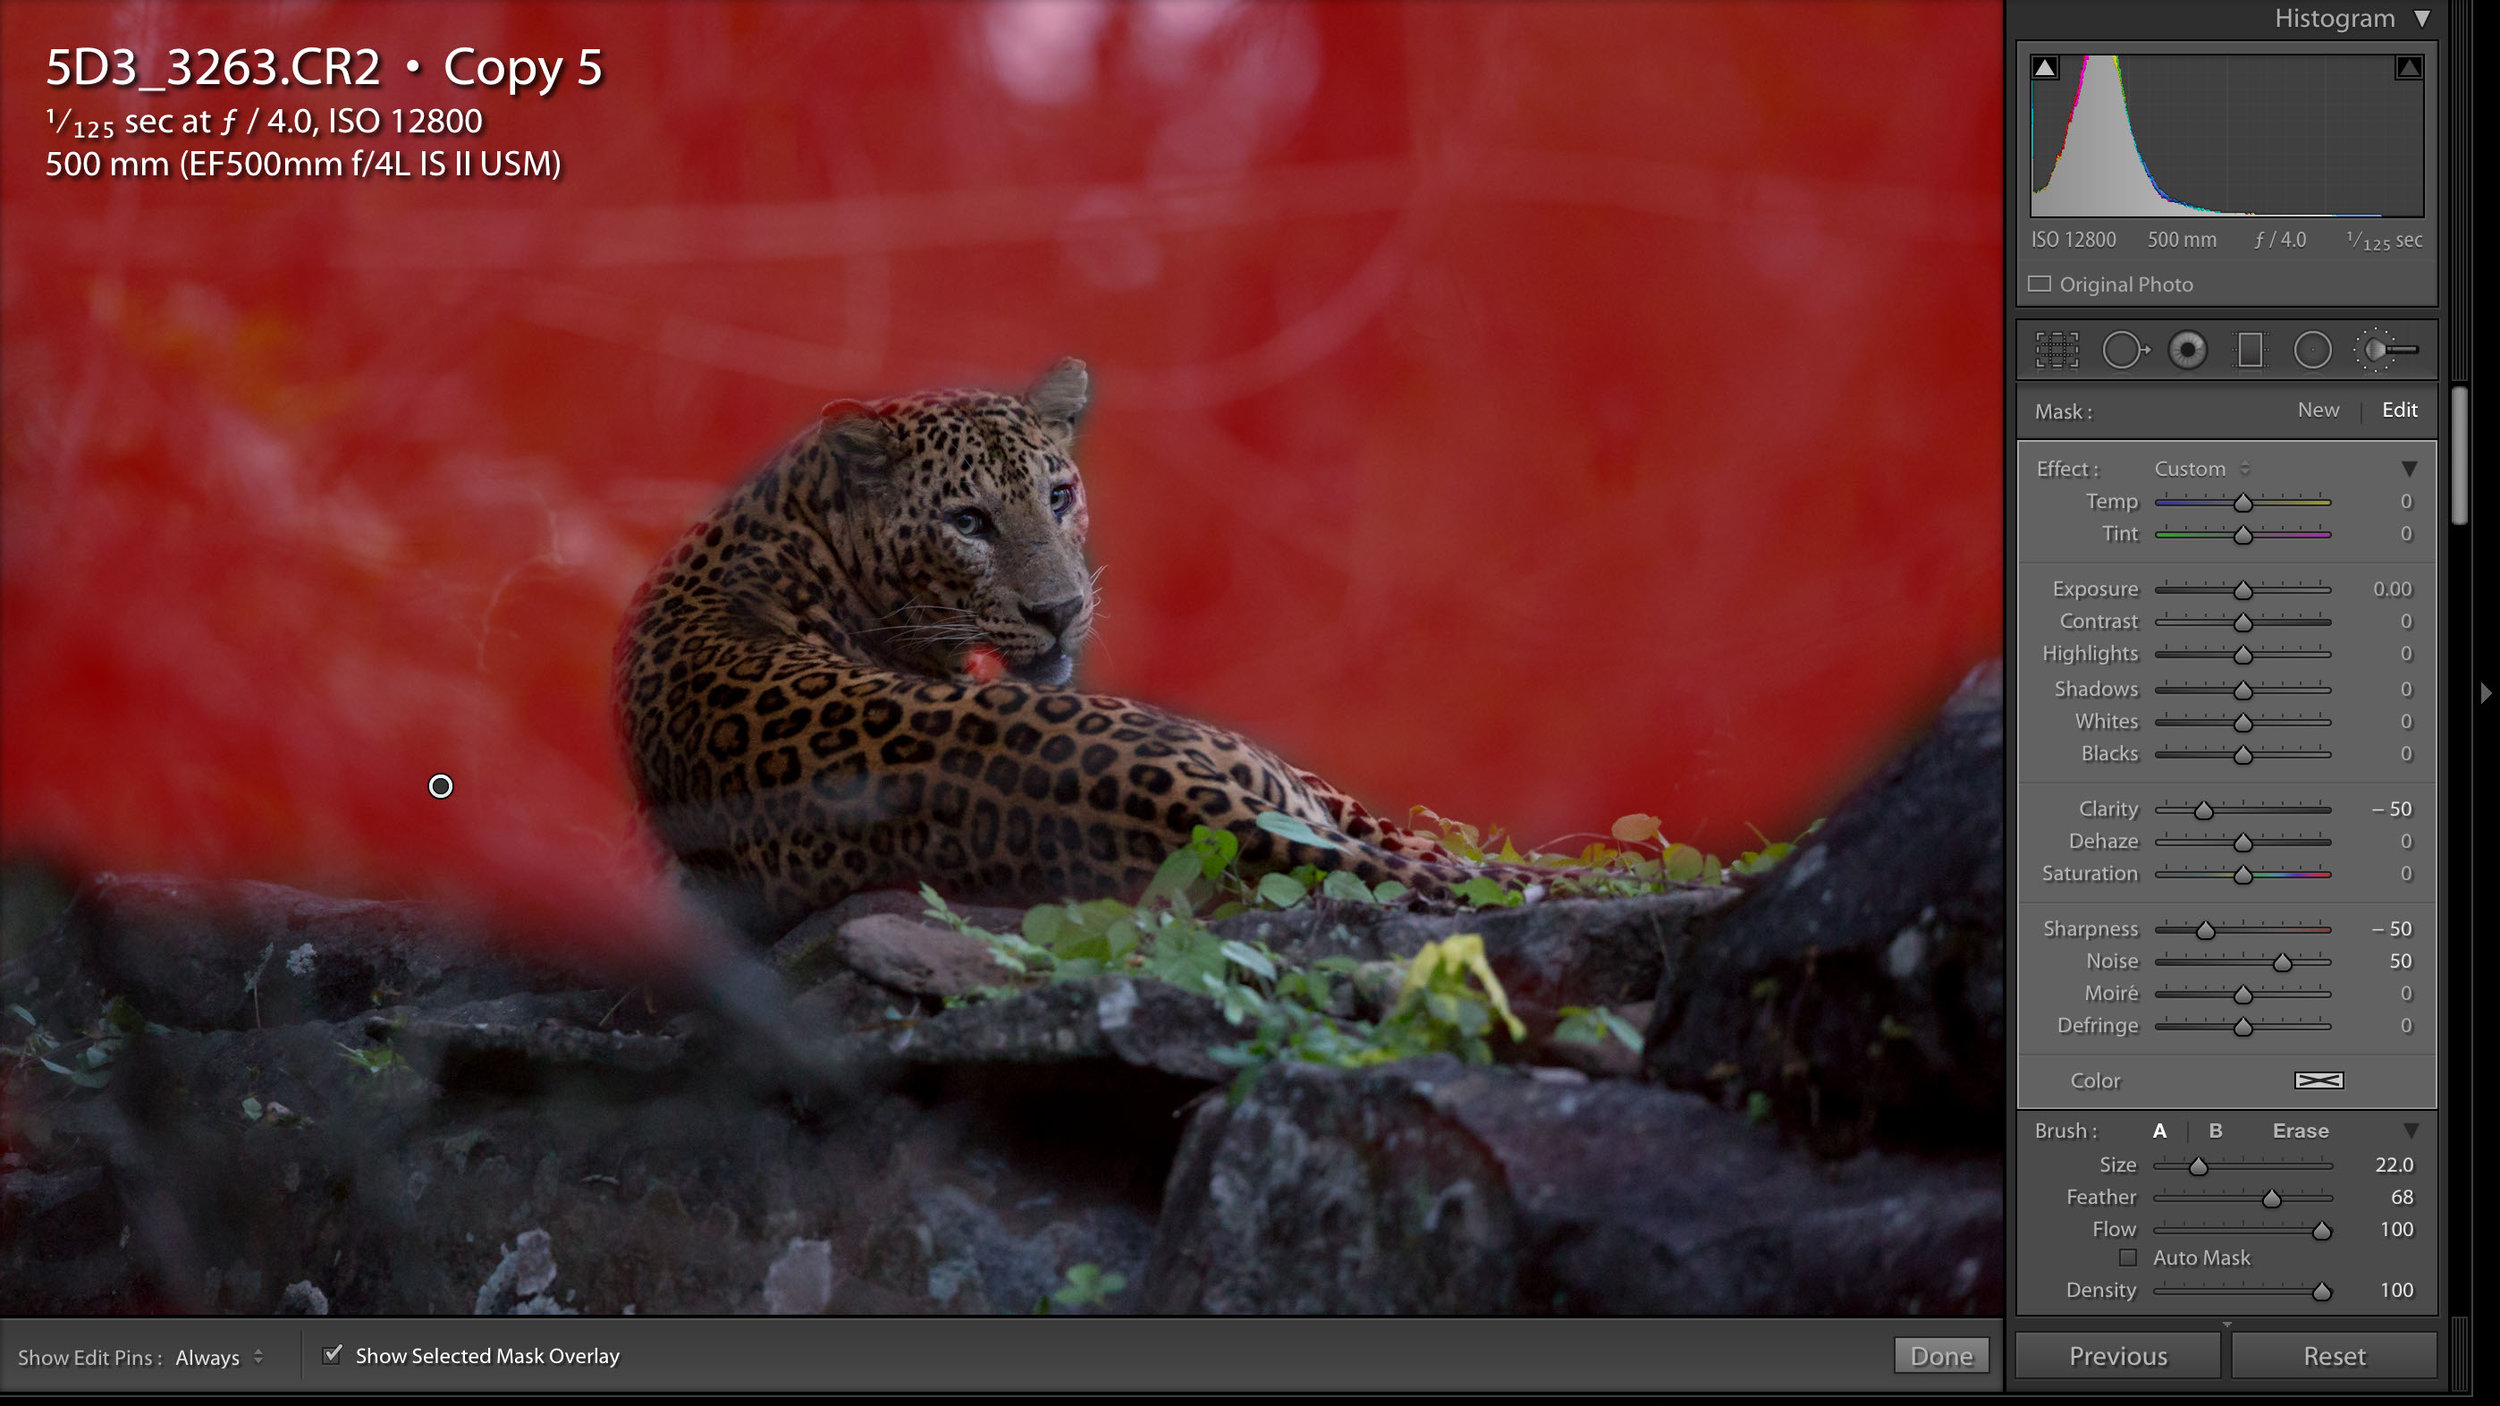
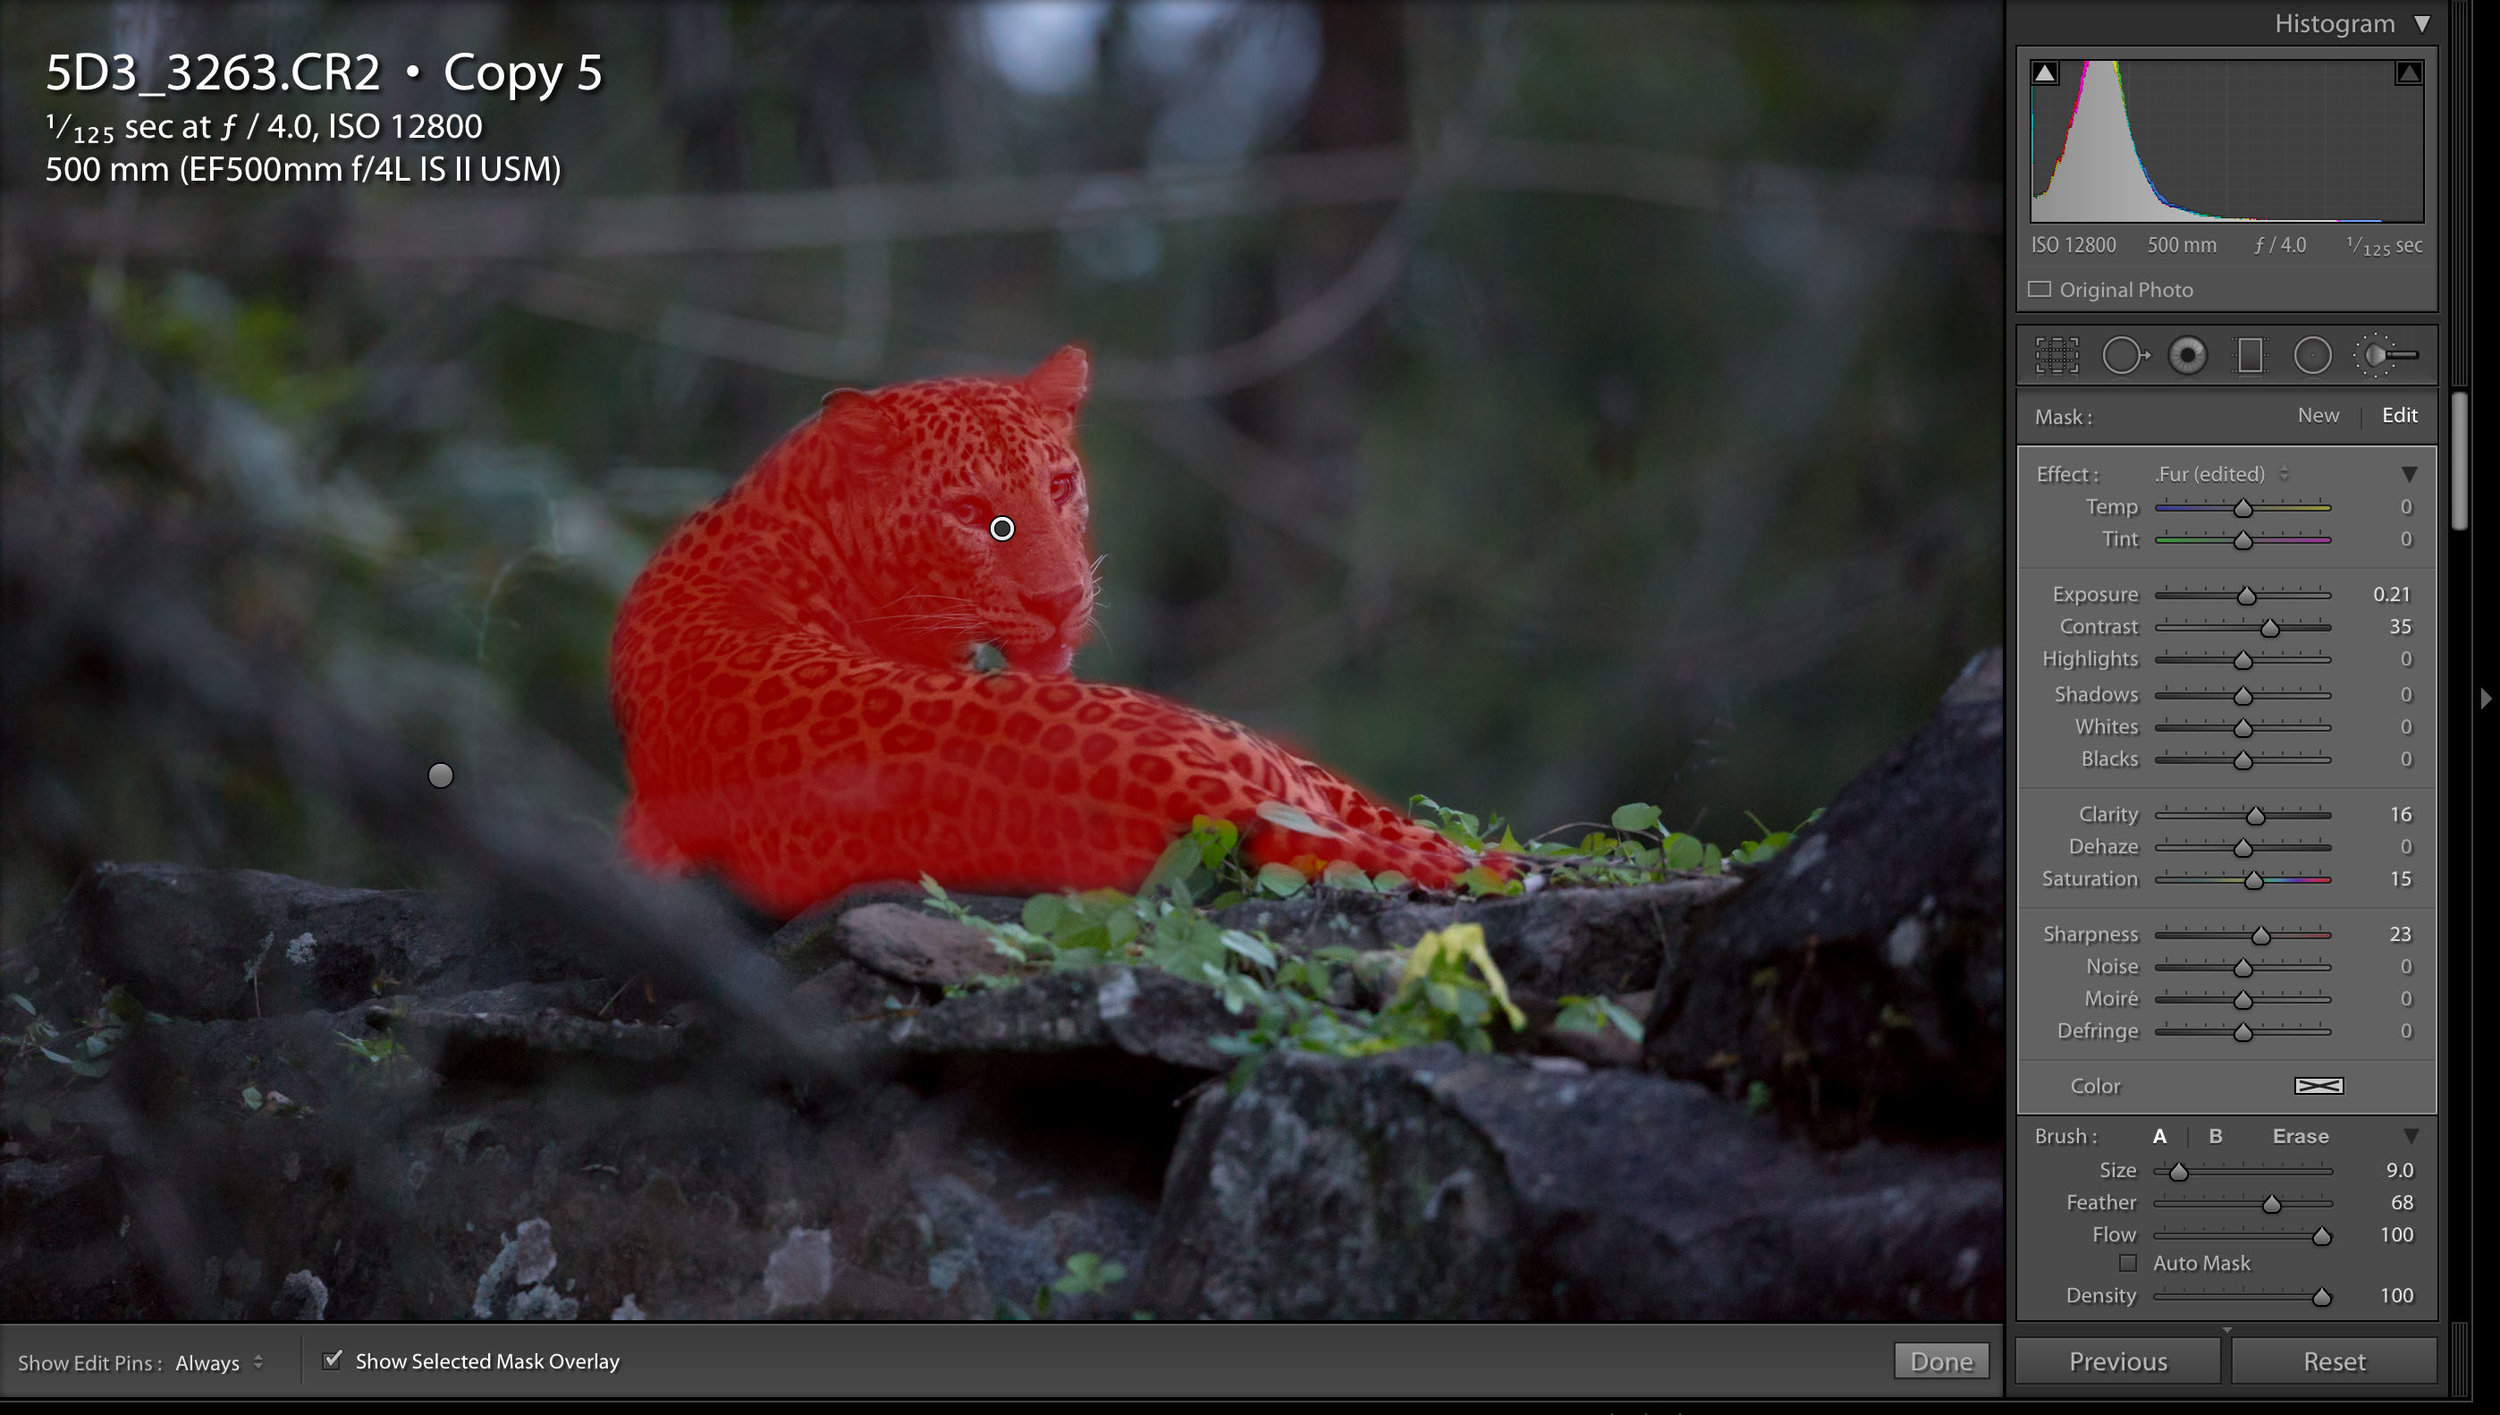
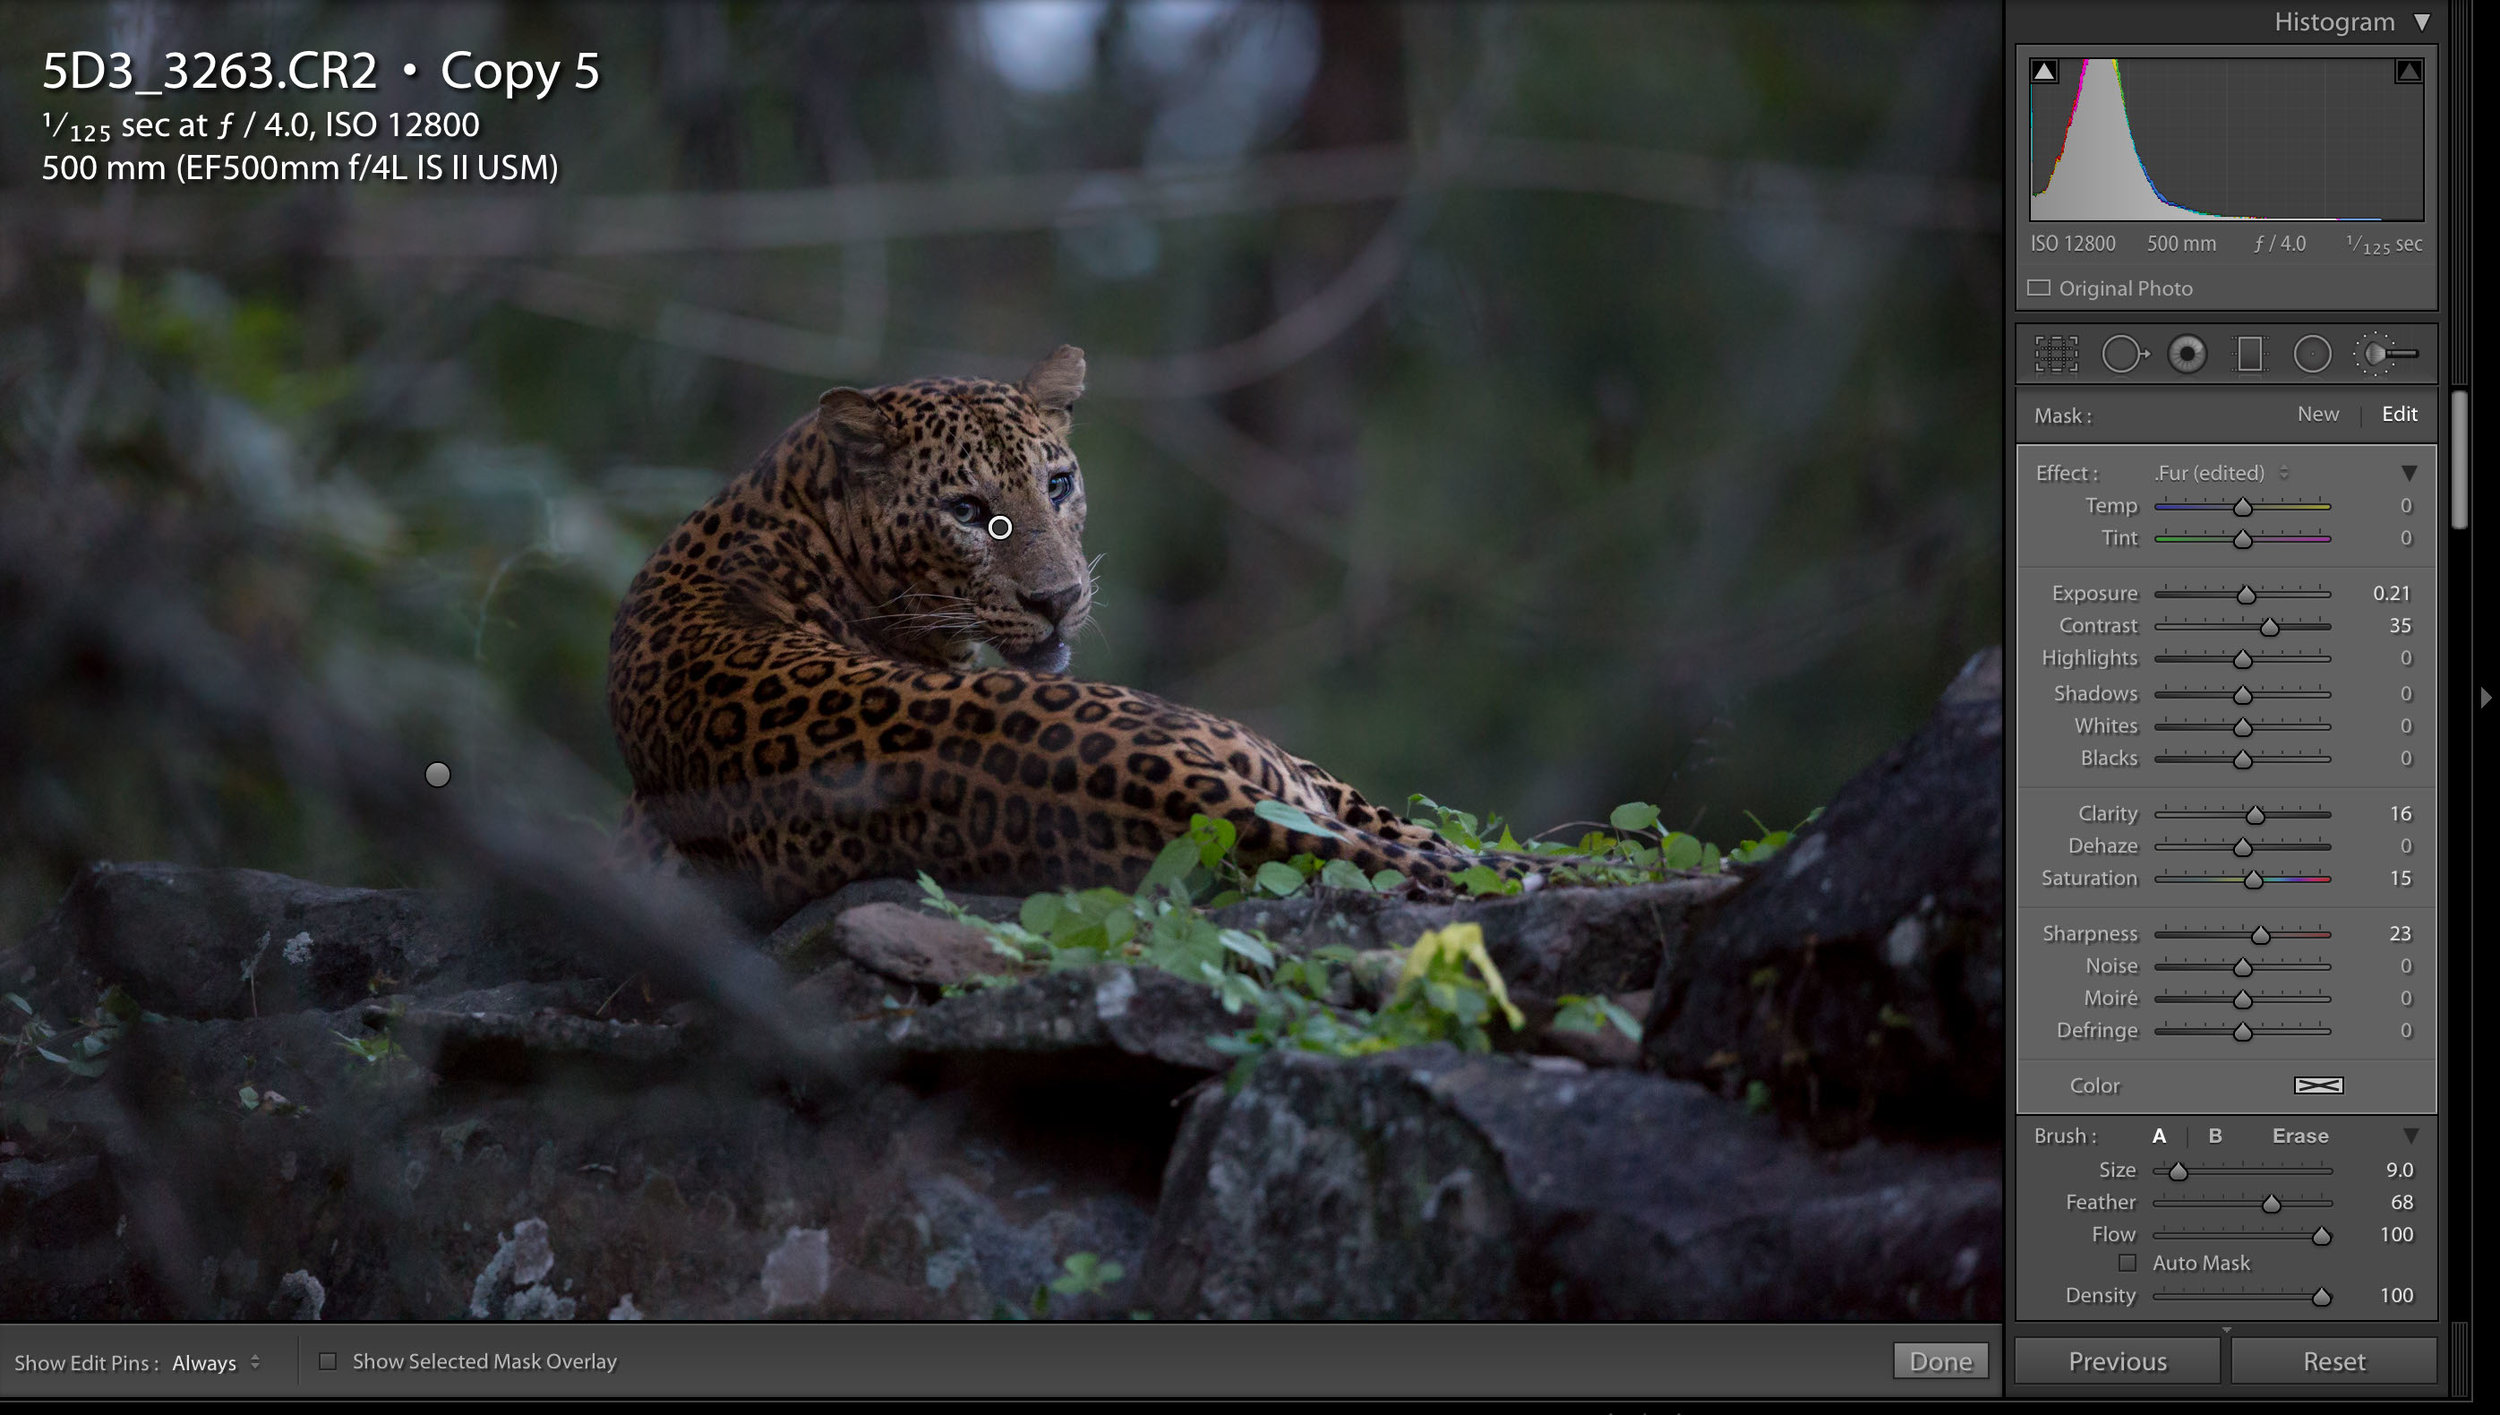
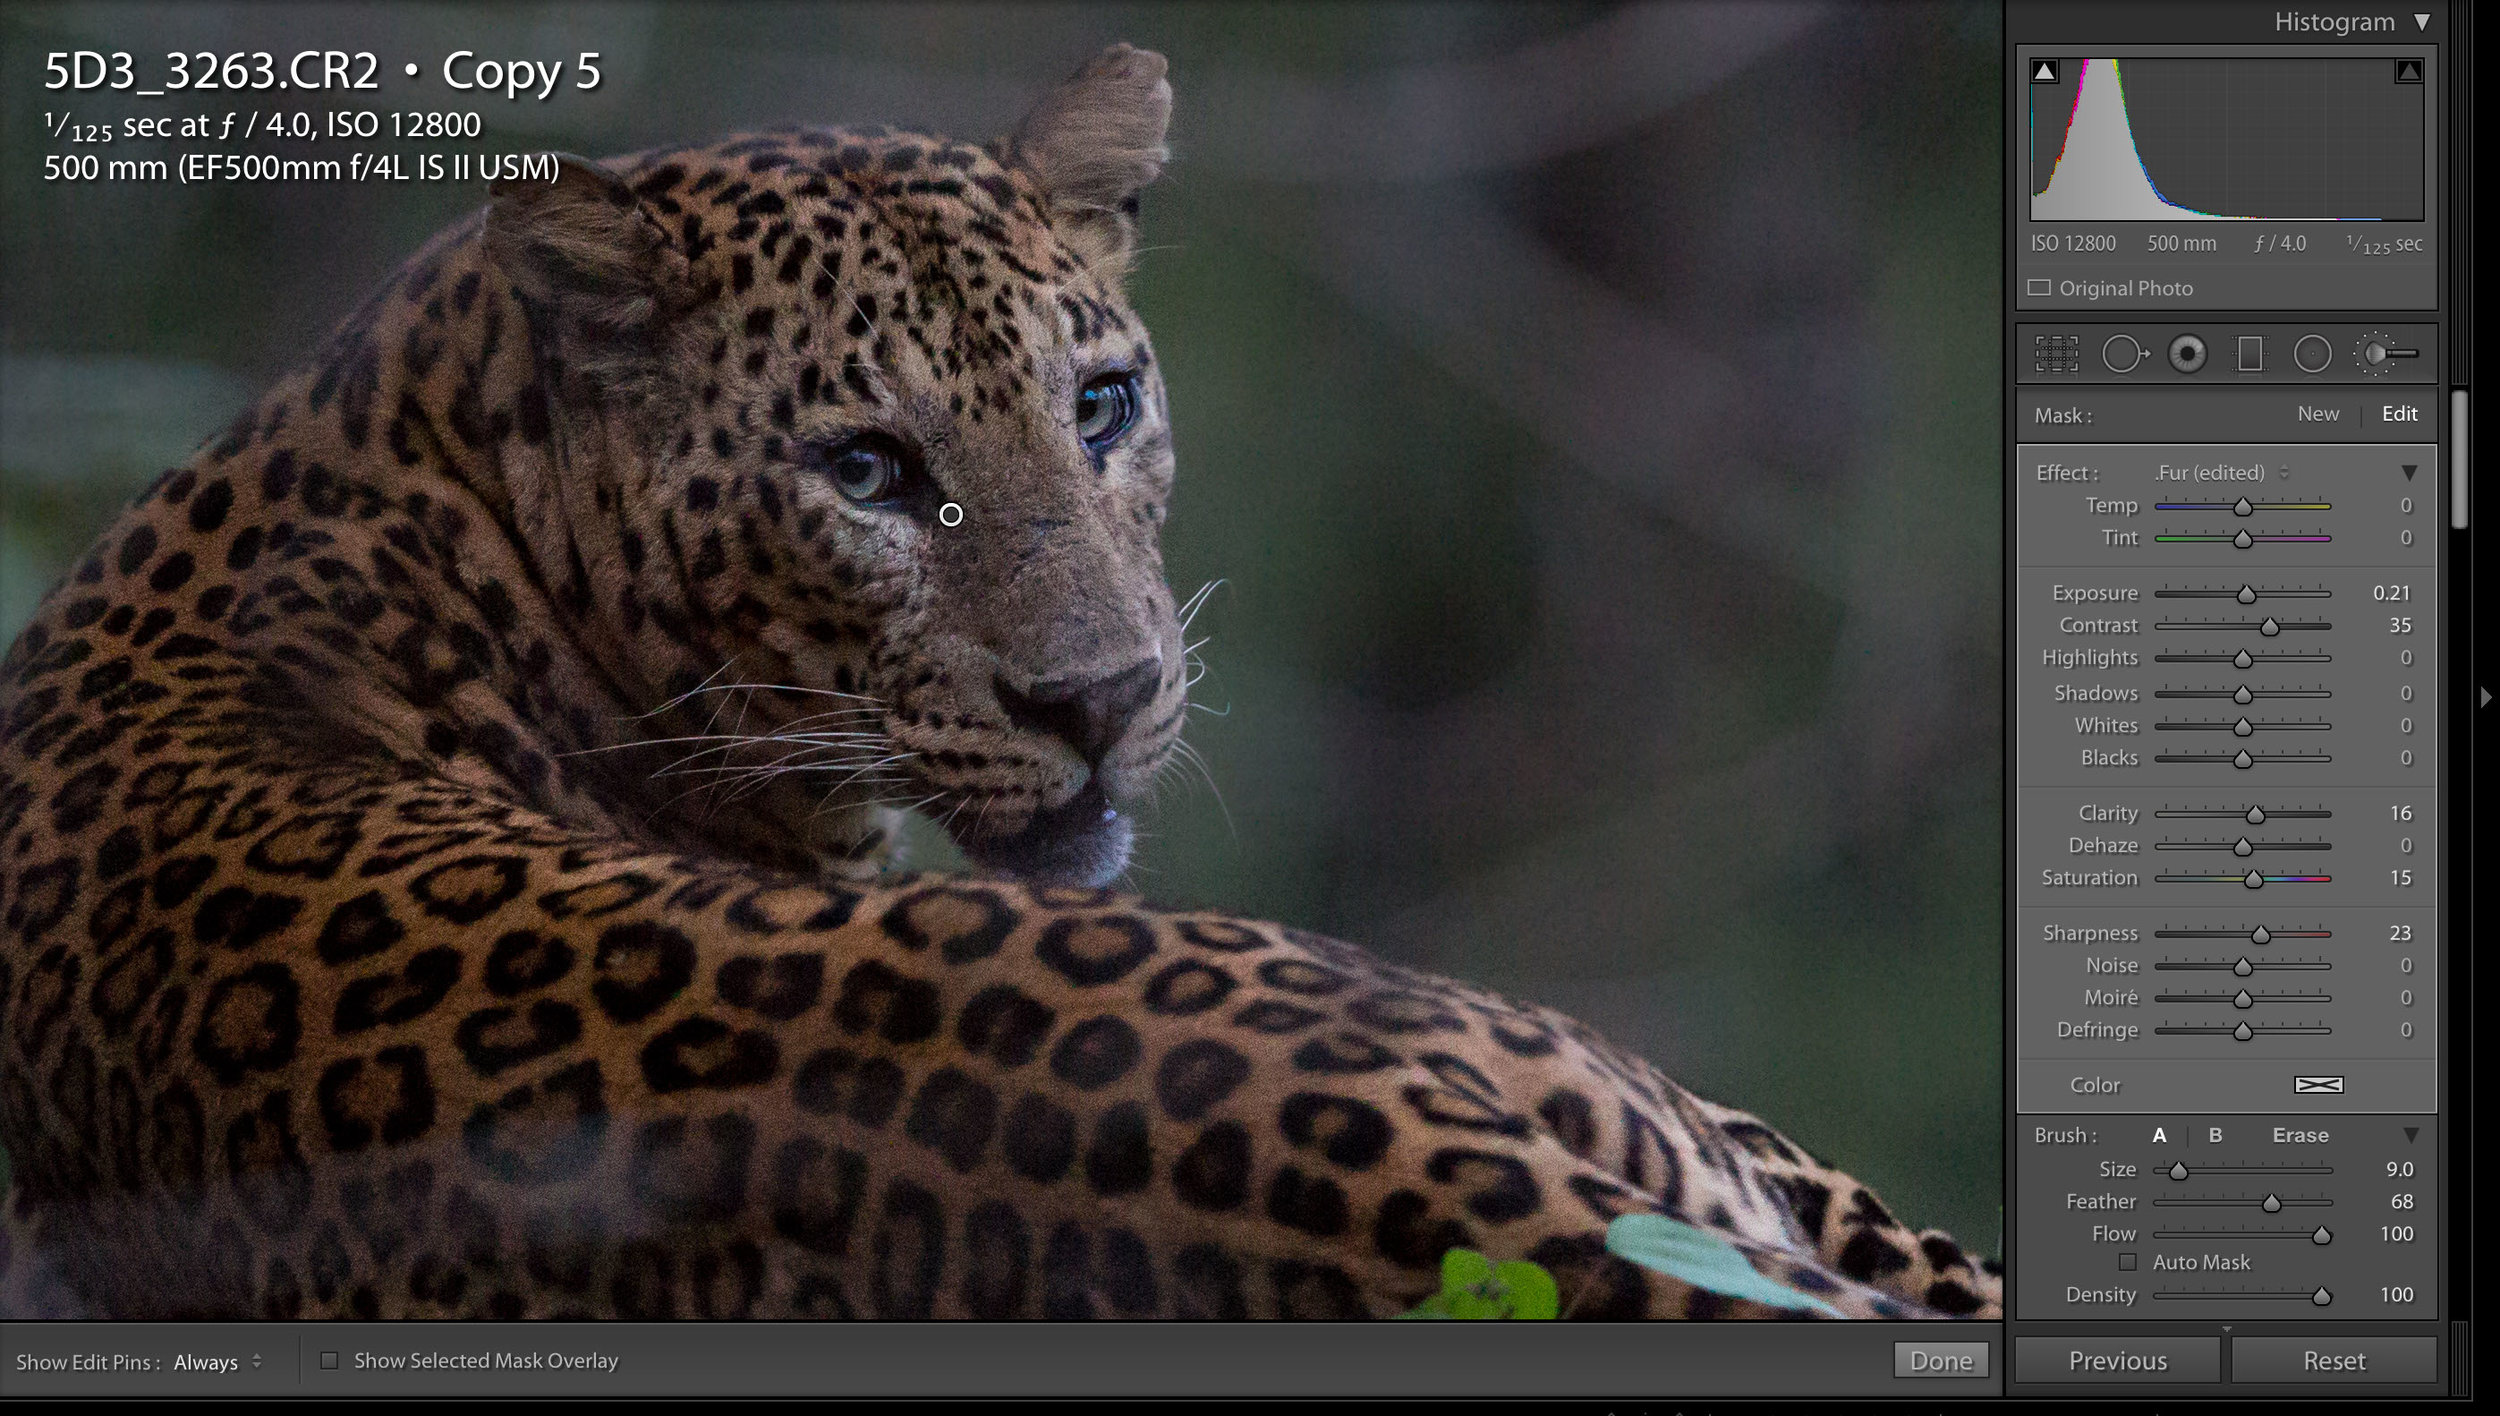
Local Adjustments for noise reduction
Local Adjustments brush in the develop module of Lightroom
This is where we start to focus in on where the noise is most prevalent; the untextured areas. In this case this is the bokeh (unfocused area) in the background. in order to this I use the local adjustments brush. When you select this, a new panel will appear with lots of settings. I reduce the clarity and sharpness and increase the Noise (reduction). Now, where-ever I paint with the brush, these changes will be applied, and only in those areas! So paint away the parts that are most troublesome, and leave area where you don't find the noise so obnoxious (usually in the textured areas).
AGAIN, less is more, it is better to do little at each stage than all at one, but you will need to play with the setting so that it suits your image and style best.
V. Sharpening
Well, by now, I have gotten rid of most of the noise and it is time to bring back the detail!
Global Adjustments
Earlier I removed the automatic sharpening Lightroom applies to RAW images, and now I will bring it back with an important adjustment, i add some masking. Masking essentially tells the sharpening process what to sharpen. When is it low (0), it will sharpen ALL edges no matter how small or large. This is why I removed it earlier as it was sharpening the noise. By increasing the Masking number, i am saying don't sharpen small edges (like single pixel noise), only slightly larger ones, like whiskers! :)
So by now having removed the noise, I can judge how much of this global adjustment I should apply and mask before I re-introduce noise again.
Local adjustments for sharpening
Just like for the luminance noise reduction, i also use a local adjustments brush to add sharpening to areas that I want it specifically. I increase the exposure and contrast (they need to both be increased together), clarity, saturation and sharpness. These are things I might alter to an entire low ISO image, but here I am only doing it on the part of the image that needs it, and that will not have obvious noise appearing because it is textured.
It is important to play with this and to zoom in to 100% and zoom out to see the whole image too. You don't want to over-do this as it will make your subject (in this case) look fake in the context of the image. The idea is to make the image look natural.

VI. Size matters
To be honest, this is something that could have gone at the start of the process, but I left it until the end as an illustration. Another way to deal with high-ISO noise is to down-size your image. Doing so means you loose sharpness and image quality, but also a lot of noise too.
It is also good to remember that we rarely see out images full-size. My full-resolution images are around 6000x4000, but you guys only see them at 2500x on the longest edge (my internet sharing size). This difference can be seen in the significant loss in noise in the 100% crops between the full-resolution and 2500x images.
Here is a 100% crop of the 2500x resized image. the noise is not noticeable at all.
Whereas the 100% crop of the full-resolution image still has some noise, albeit small.
So, if you are going to be up-loading to the net, your images will be down-sized either by you or Facebook/twitter/etc.... and the noise will be less evident in the final image. So bare this in mind... you do not need to remove all noise at 100% zoom of your full-resolution image to get a good image in the end. If you know your shot is destined for Facebook, then you don't need to do such strong noise reduction.
As a general trend I upload my images at 2500x, but for more information on the image sizes used in social media... you can check out this old post of mine.
Other considerations
- You will never get a high-ISO image to look like one taken at ISO 100, so don't stress about it, be realistic... we are strestching our cameras capabilities, it will never perform as solidly as when it is in optimal conditions.
- Noise is not as prominent in printed images, so if your image is to be printed, you don't have to be so harsh with noise reduction.
- Following on from this, don’t pixel peep, you will almost always see some grain or noise in an image at 100%. Look at it at the size it is intended to be.
- Sleep on it! Edit, go away and look again later to see if you still agree. Sometimes fresh eyes will tell you if it is over-processed or just right.
- If you still can't get a good result ask yourself why, honestly. Is it you did not shoot in optimum settings? or is it a limitation of your gear? The better the original image is, the better the processed one will be too.
- Own it and make it a part of your narrative. It's got so much noise you might as well be taking still-life images of Swiss-cheese, but the emotion in the image is awesome. So just own it, except it and love the moment you captured. You don't always have to have perfect images, sometimes it is the imperfections that add to the story, and adds to the feeling of it.
- Go black and white. It sounds stupid, but high contrast (low dynamic range), grainy (lots of noise) images suit black and white... so give that a go too. :)
In summary
CHEAT SHEET
- Remember the output as this will determine the amount of noise reduction you will need to do
- Set your exposure correctly
- Set your white balance
- Do your Blacks/Highlights - bring back some dynamic range in the image
- Remove the automatic sharpening
- Colour Noise - I am lucky that this is not a problem with my camera, so the standard setting is usually enough, but remember to be minimalist.
- Luminance Noise - do the minimum, you want to retain the details
- Use local adjustments to apply strong noise reduction to the areas most effected - use the brush tool to paint areas with the most obvious noise (tend to be the un-textured areas /dark)
- Global Sharpening - use the mask panel so you don't sharpen any remaining noise, and keep it low
- Sharpen selective areas with local adjustments - sharpen and add clarity to the subject (assuming it is textured, if your subject is not, this will only add noise back)
- Finish with any other adjustments you need
- Sleep on it, check it out the next day and see if you think it looks natural or too processed!
Things to avoid
- Increasing exposure
- Increasing Clarity
- Global sharpening BEFORE removing noise
- Cropping, this is the reverse of down-sizing... a little cropping is fine, but heavy cropping will make noise more obvious
- Increasing shadows brings details in the shadow areas, including the noise